Schedule a demo with us
We can help you solve company communication.
You can localize your Java projects into other languages easily using the Auto Localize app, thereby rapidly increasing the audience for your Java applications.
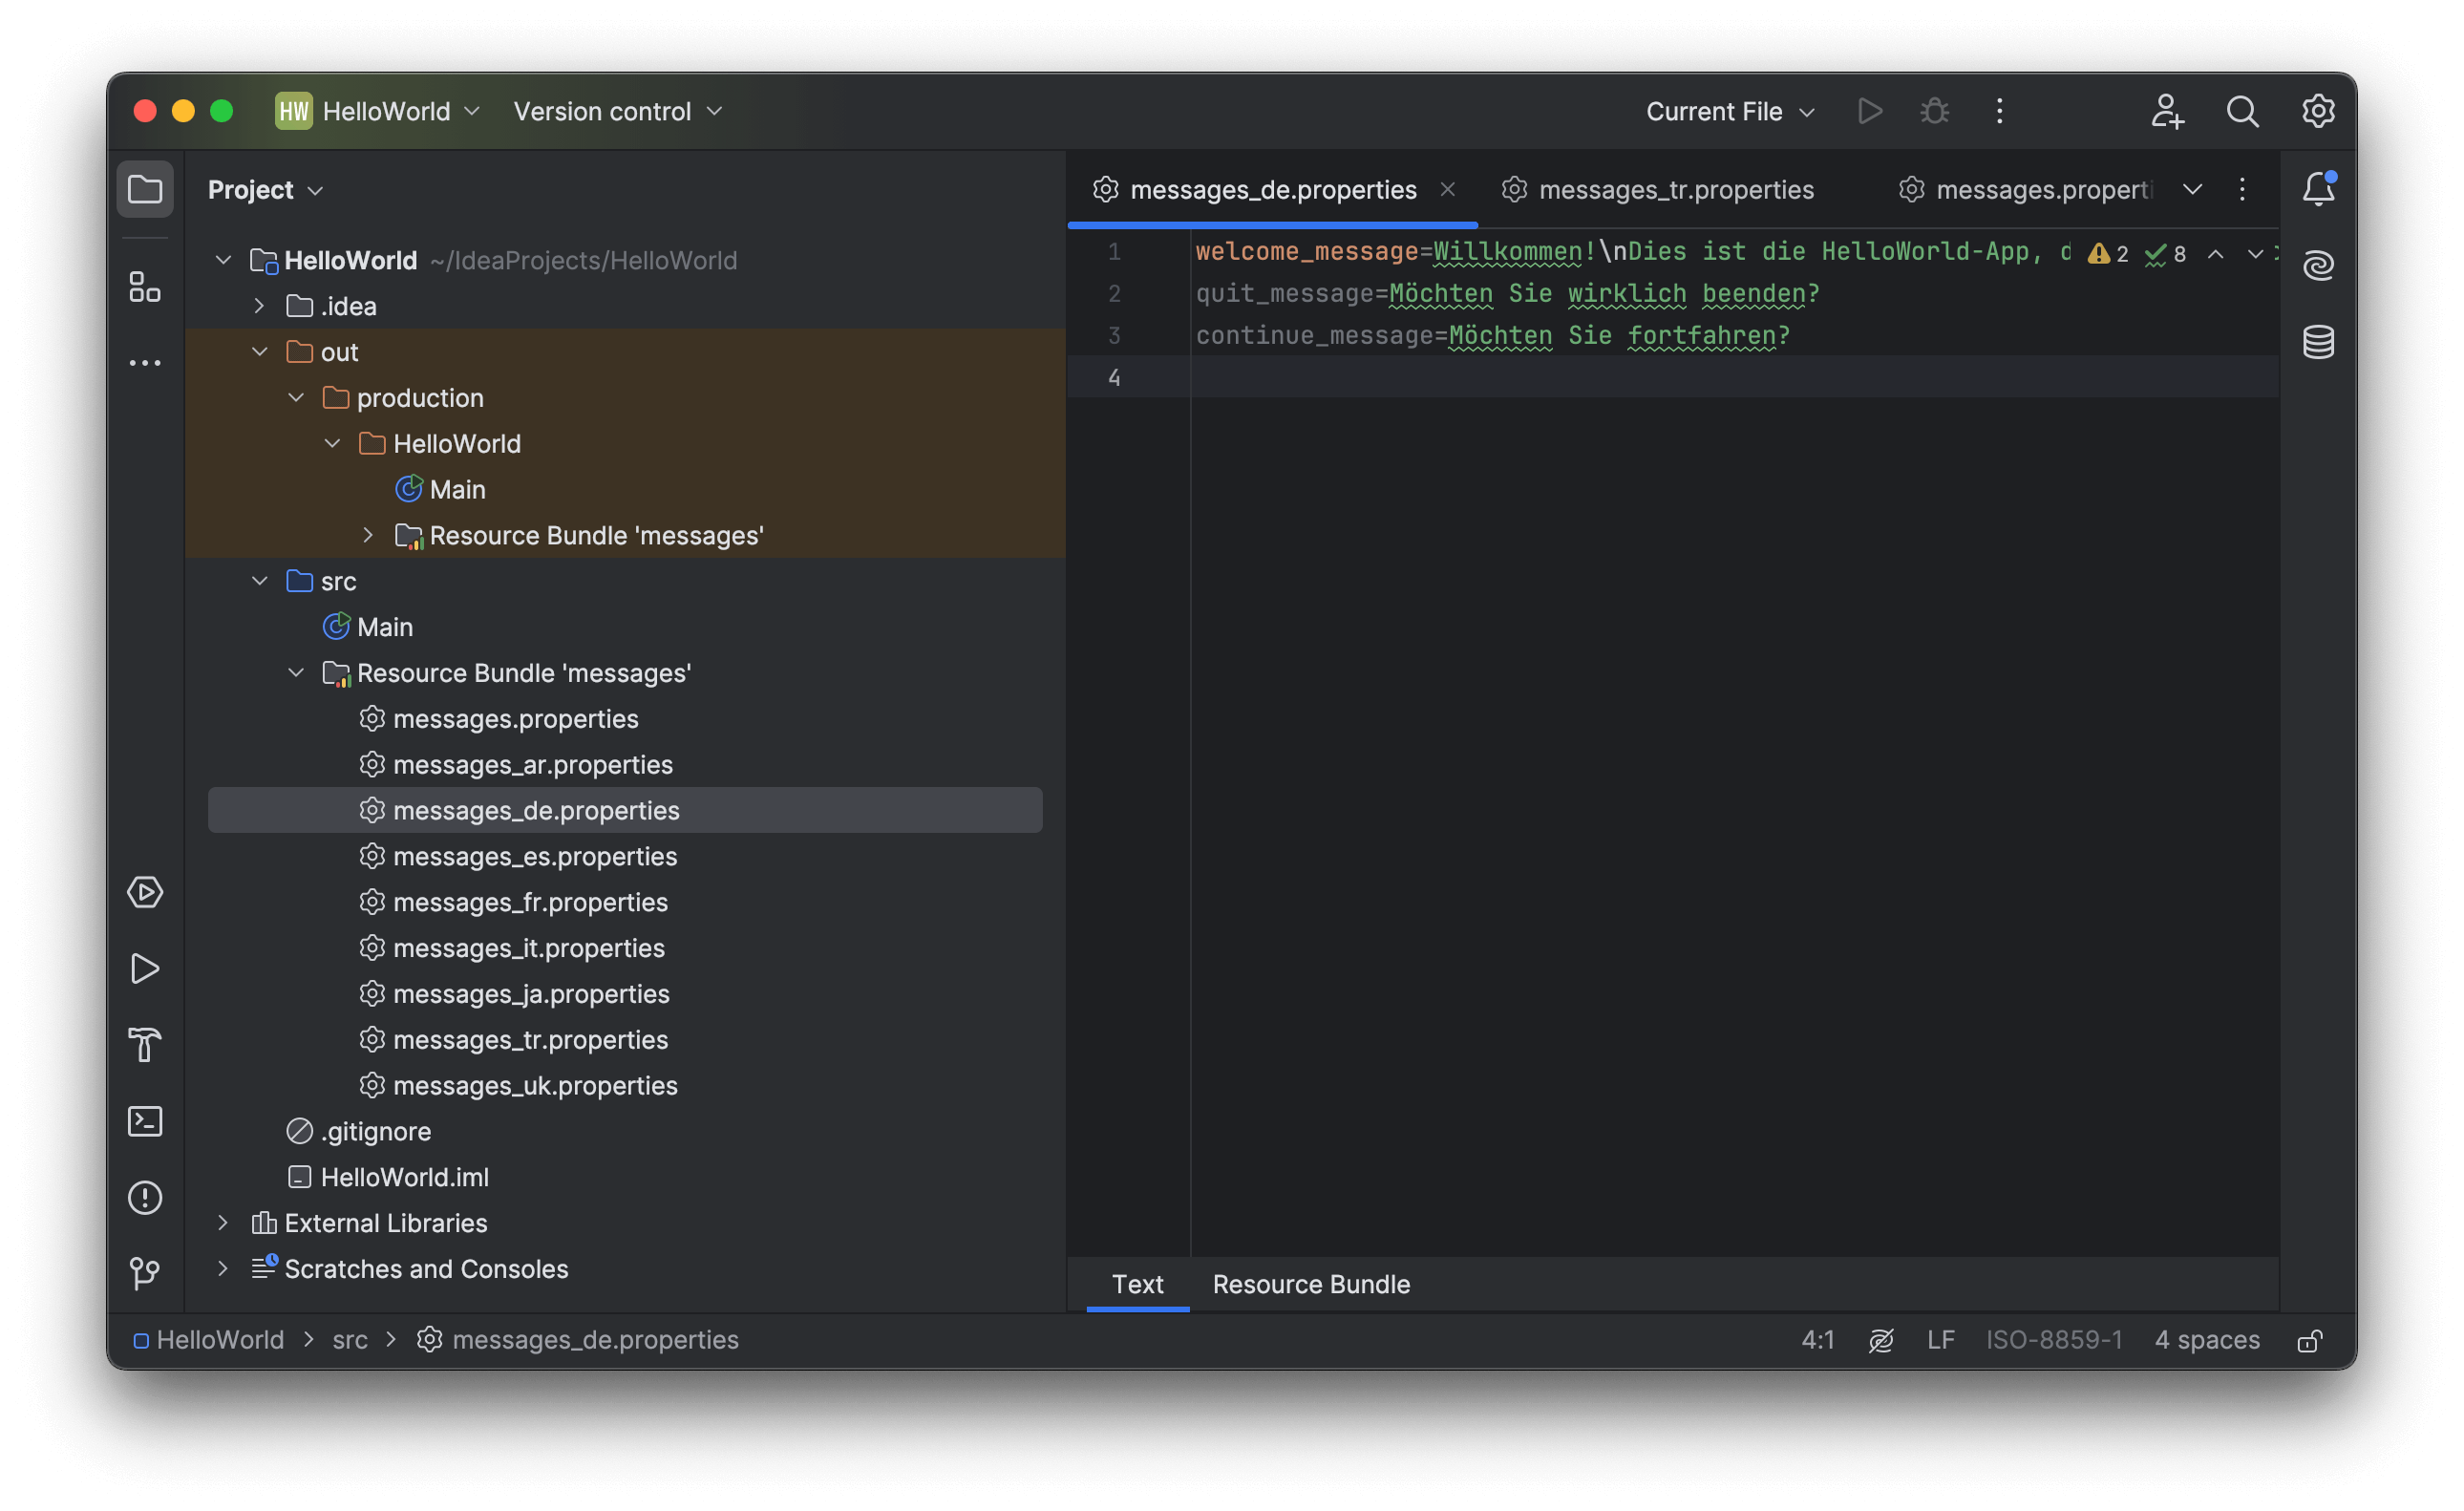
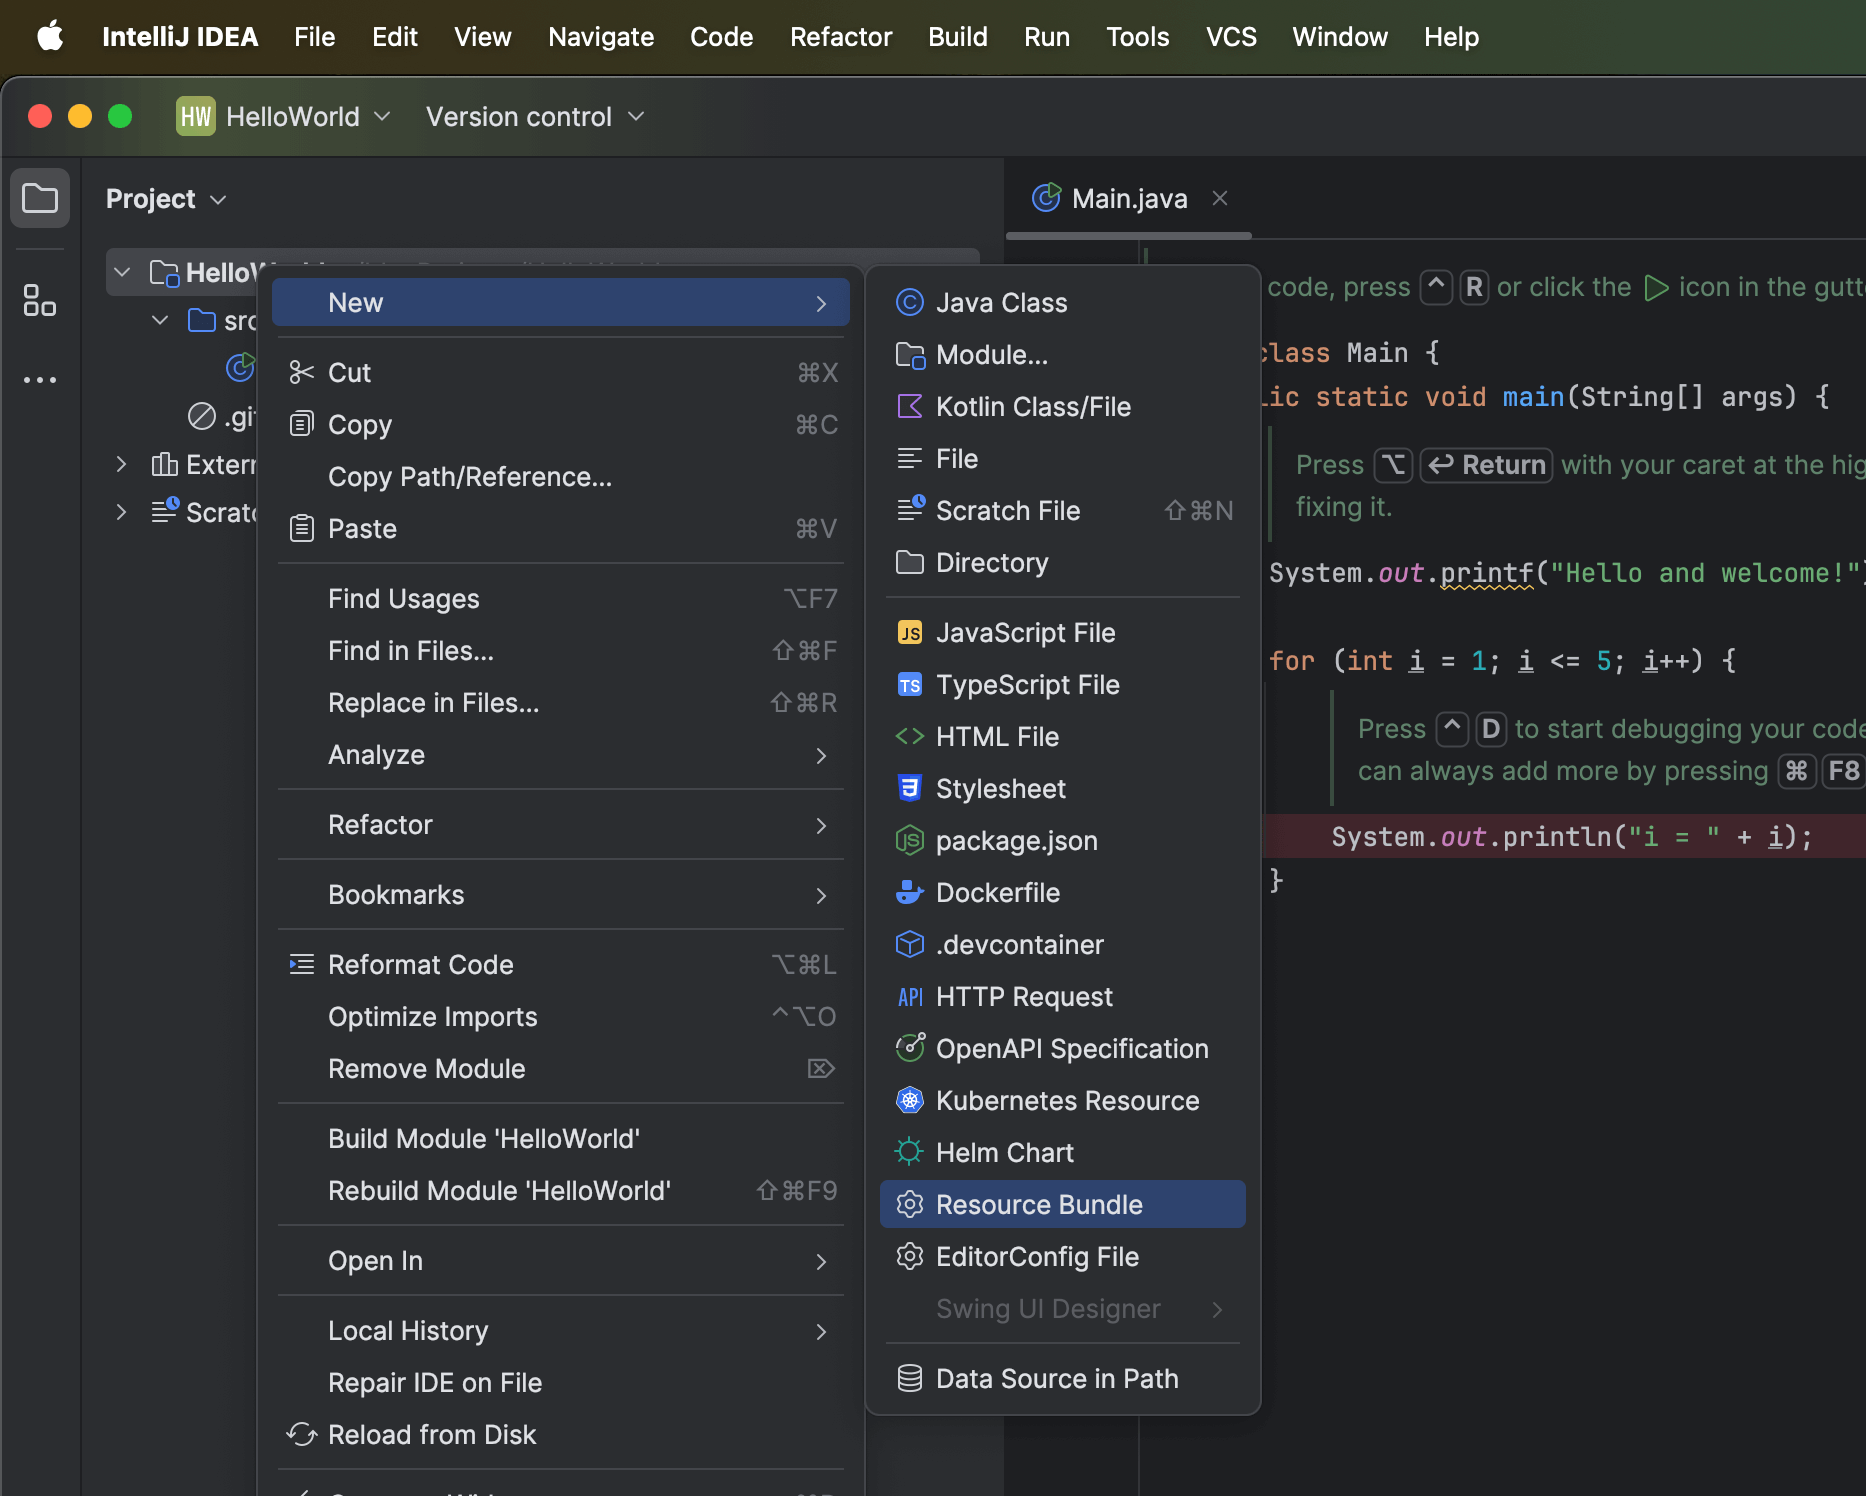
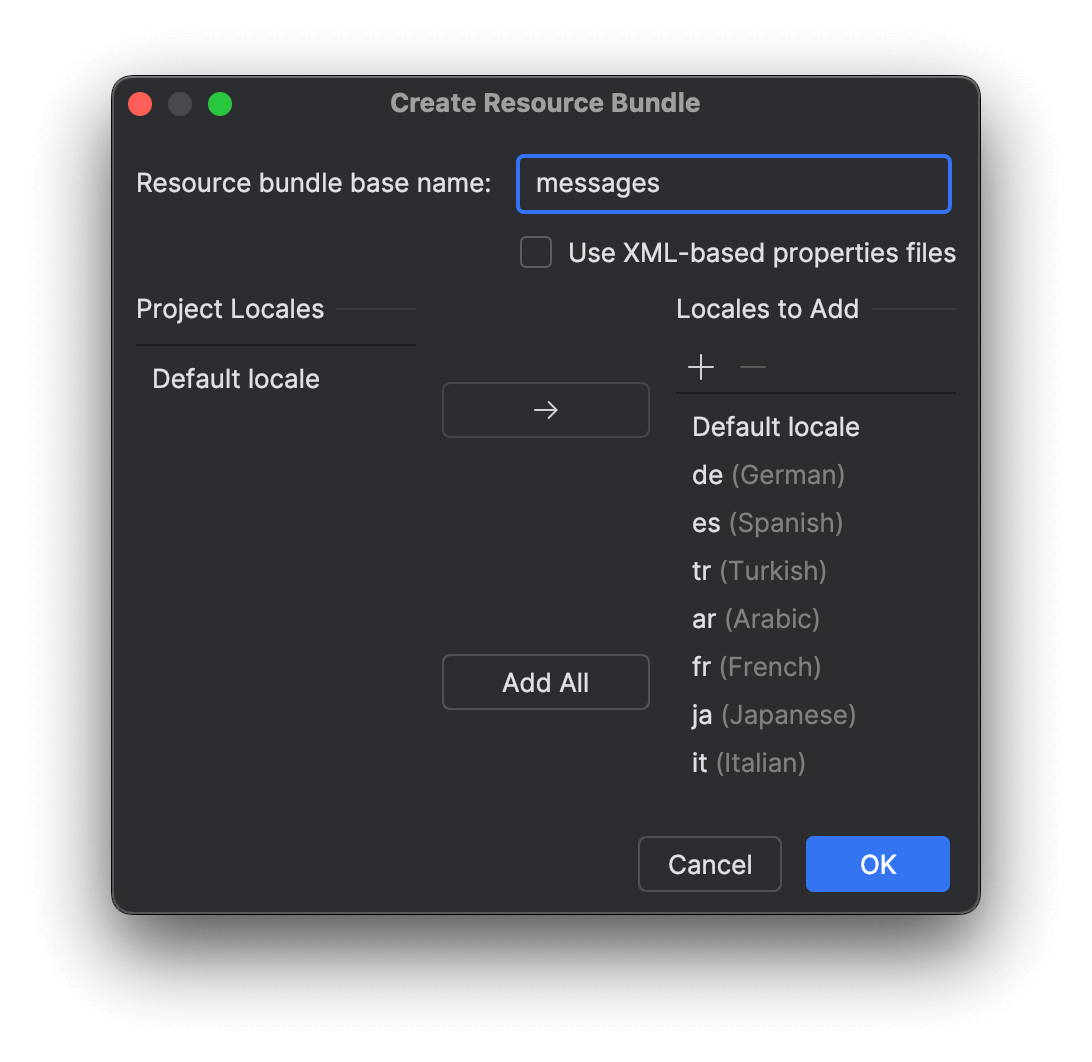
In Java projects, localization is usually done through '.properties' files held under the 'Resource Bundle'. After adding the languages you want to localize to your project, '.properties' files for each language will be created under the 'Resource Bundle'. The process might vary depending on the IDE you are using. In this tutorial Intellij IDE will be used.
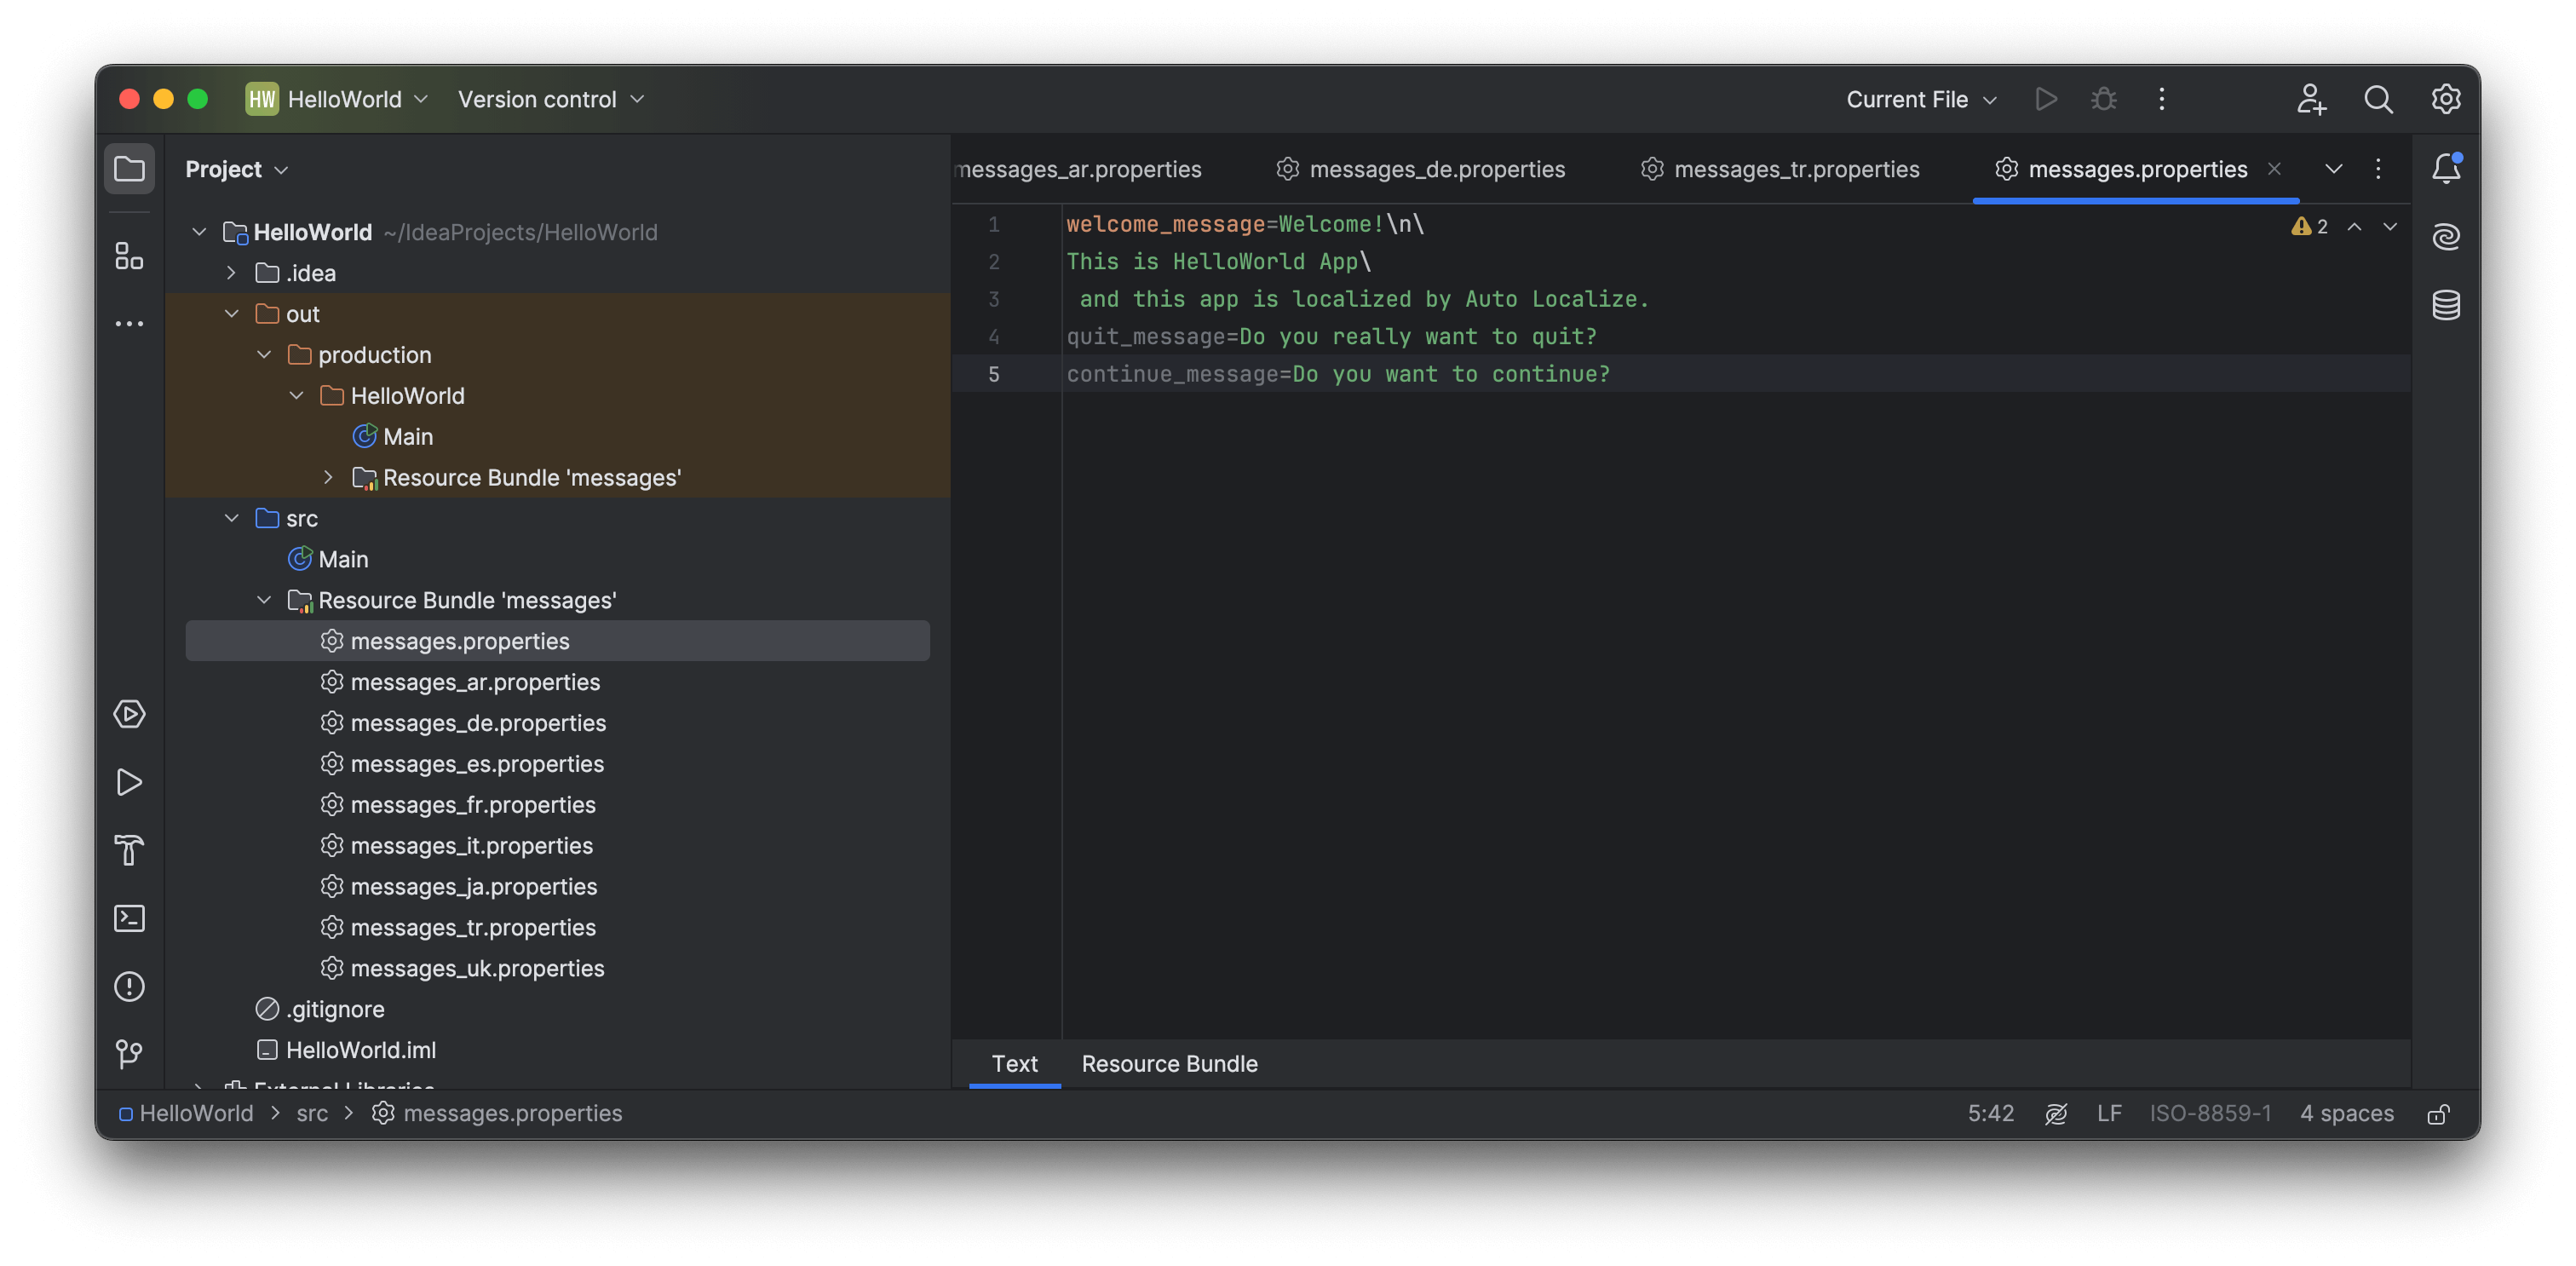
Edit your main .properties file in a language that is appropriate for the development language of your application.
The magic begins from this point onwards. You can now easily localize your Java project using Auto Localize.
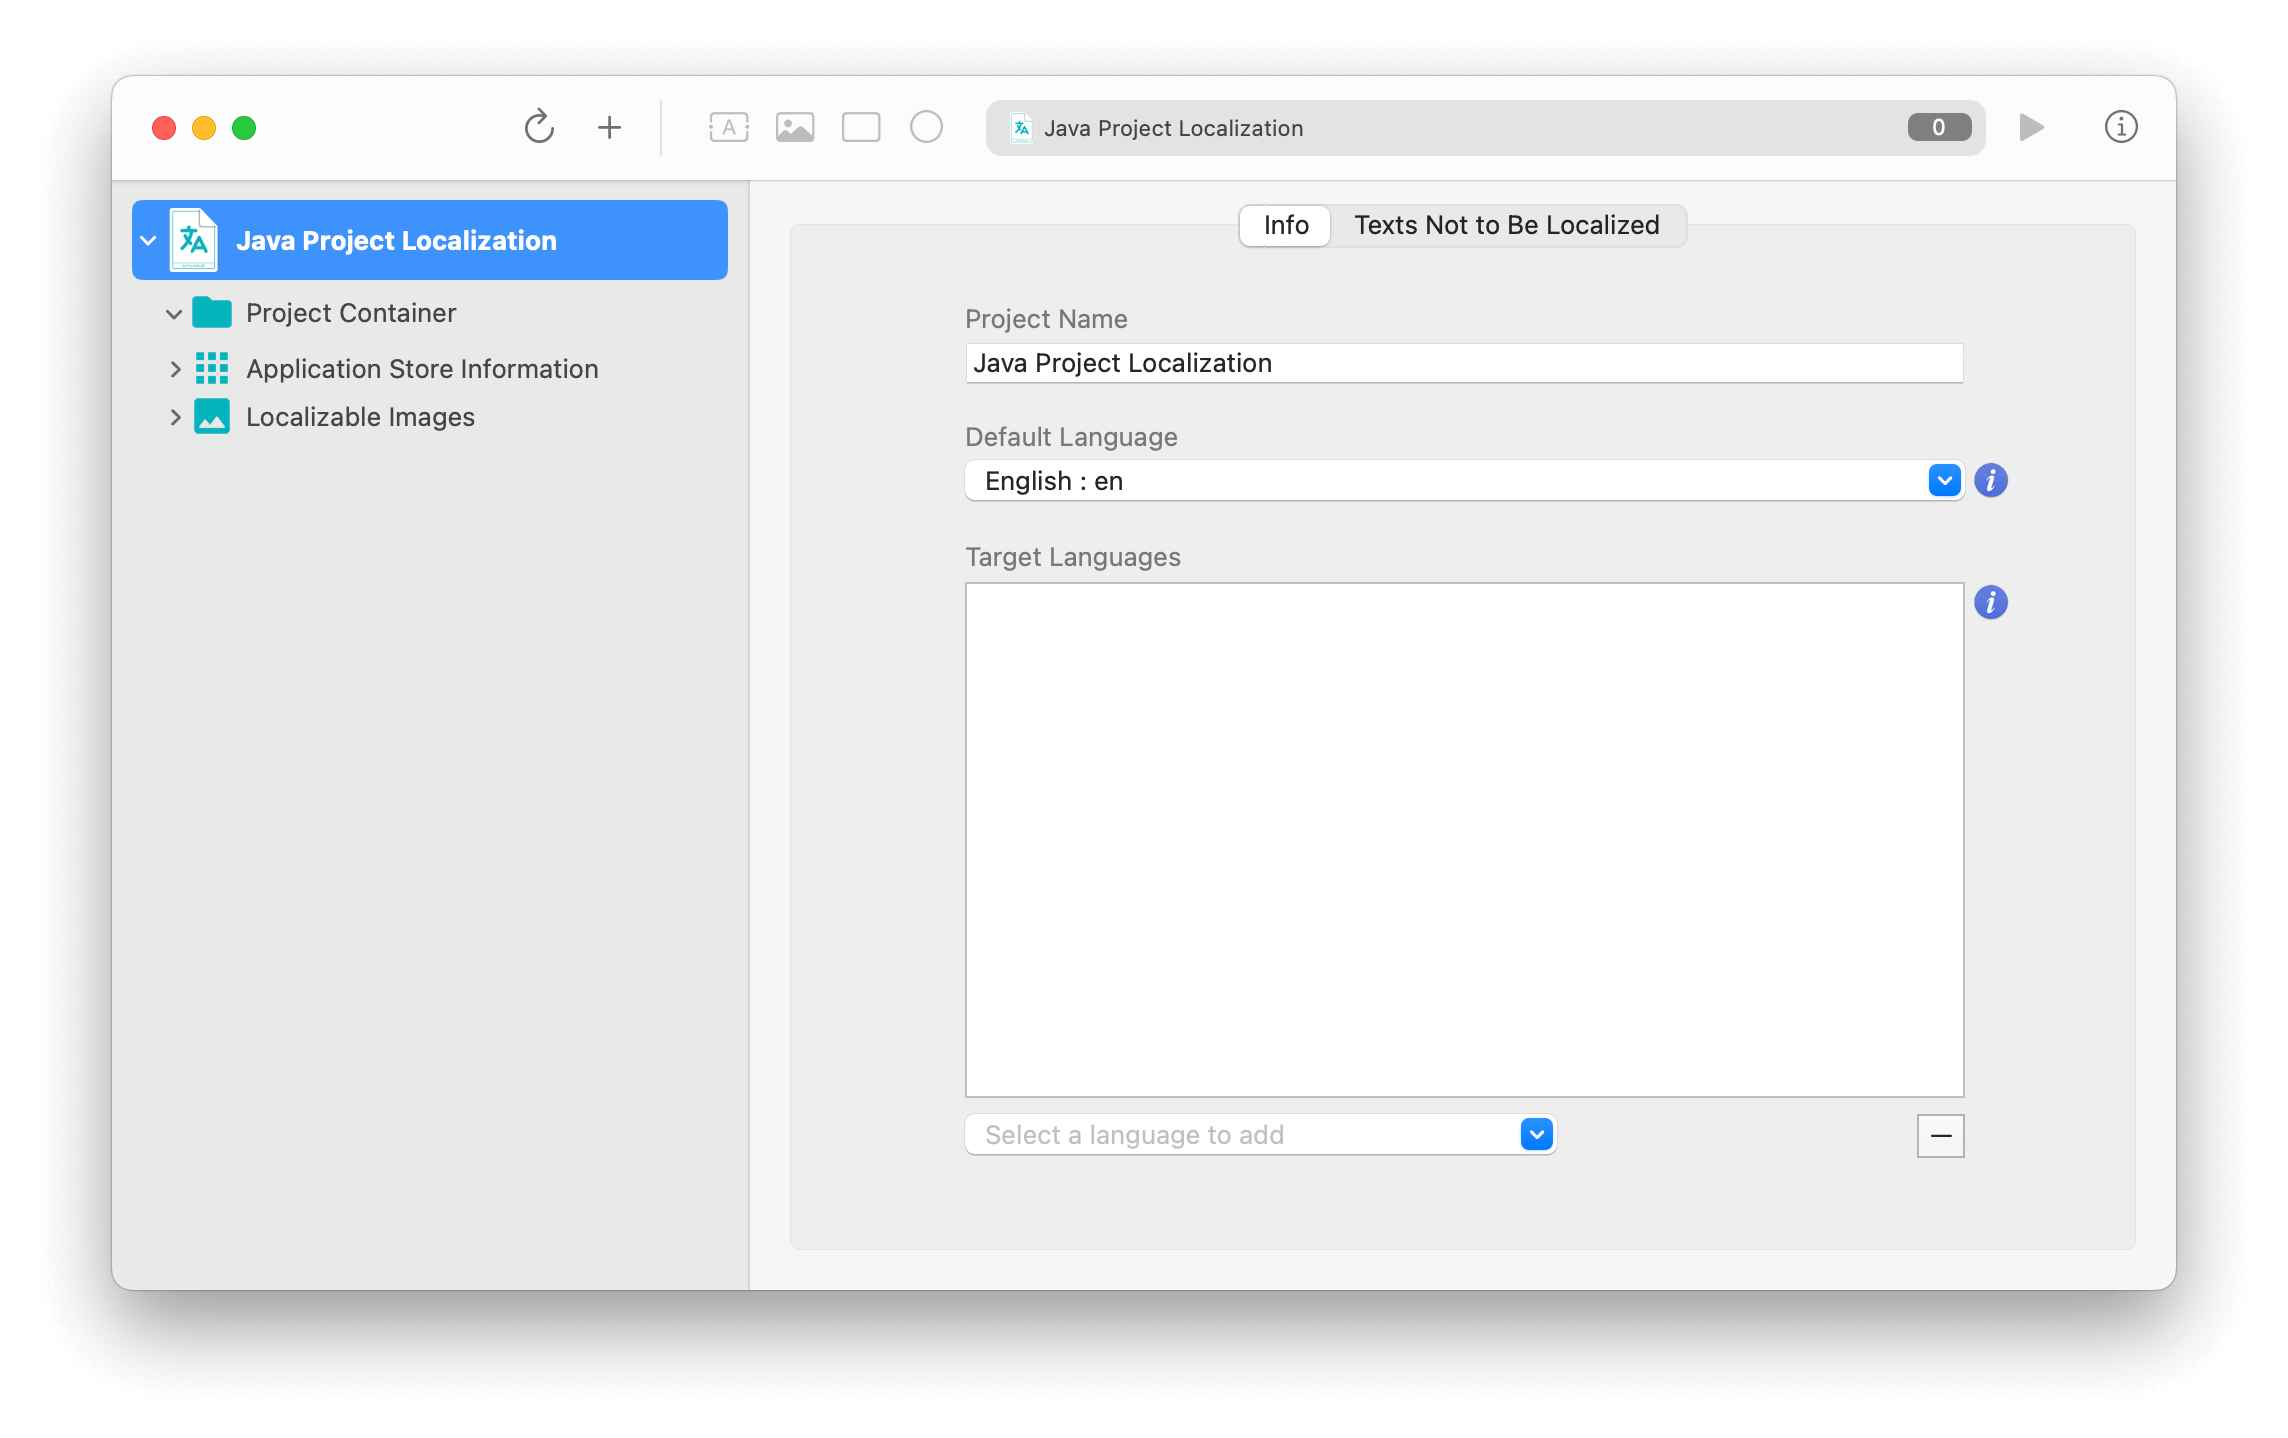
Open the Auto Localize app and create a new project. Give your project a suitable name. Set the default language value to the language your project is developed.
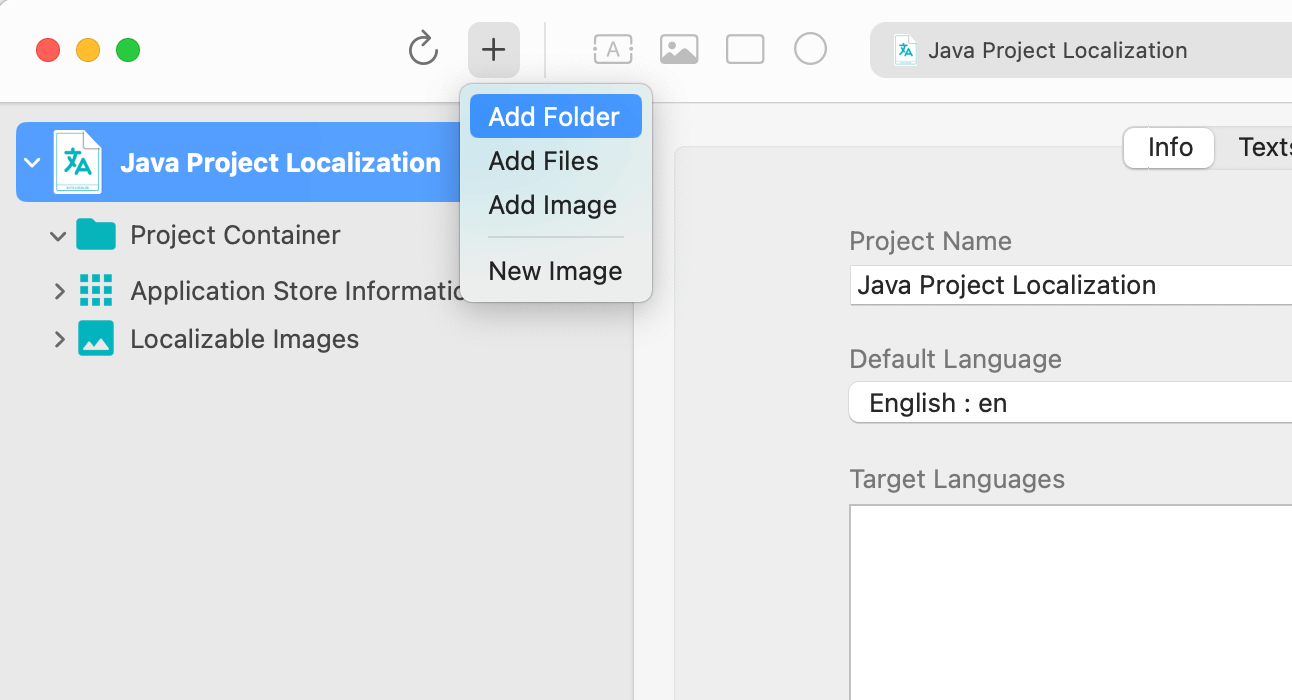
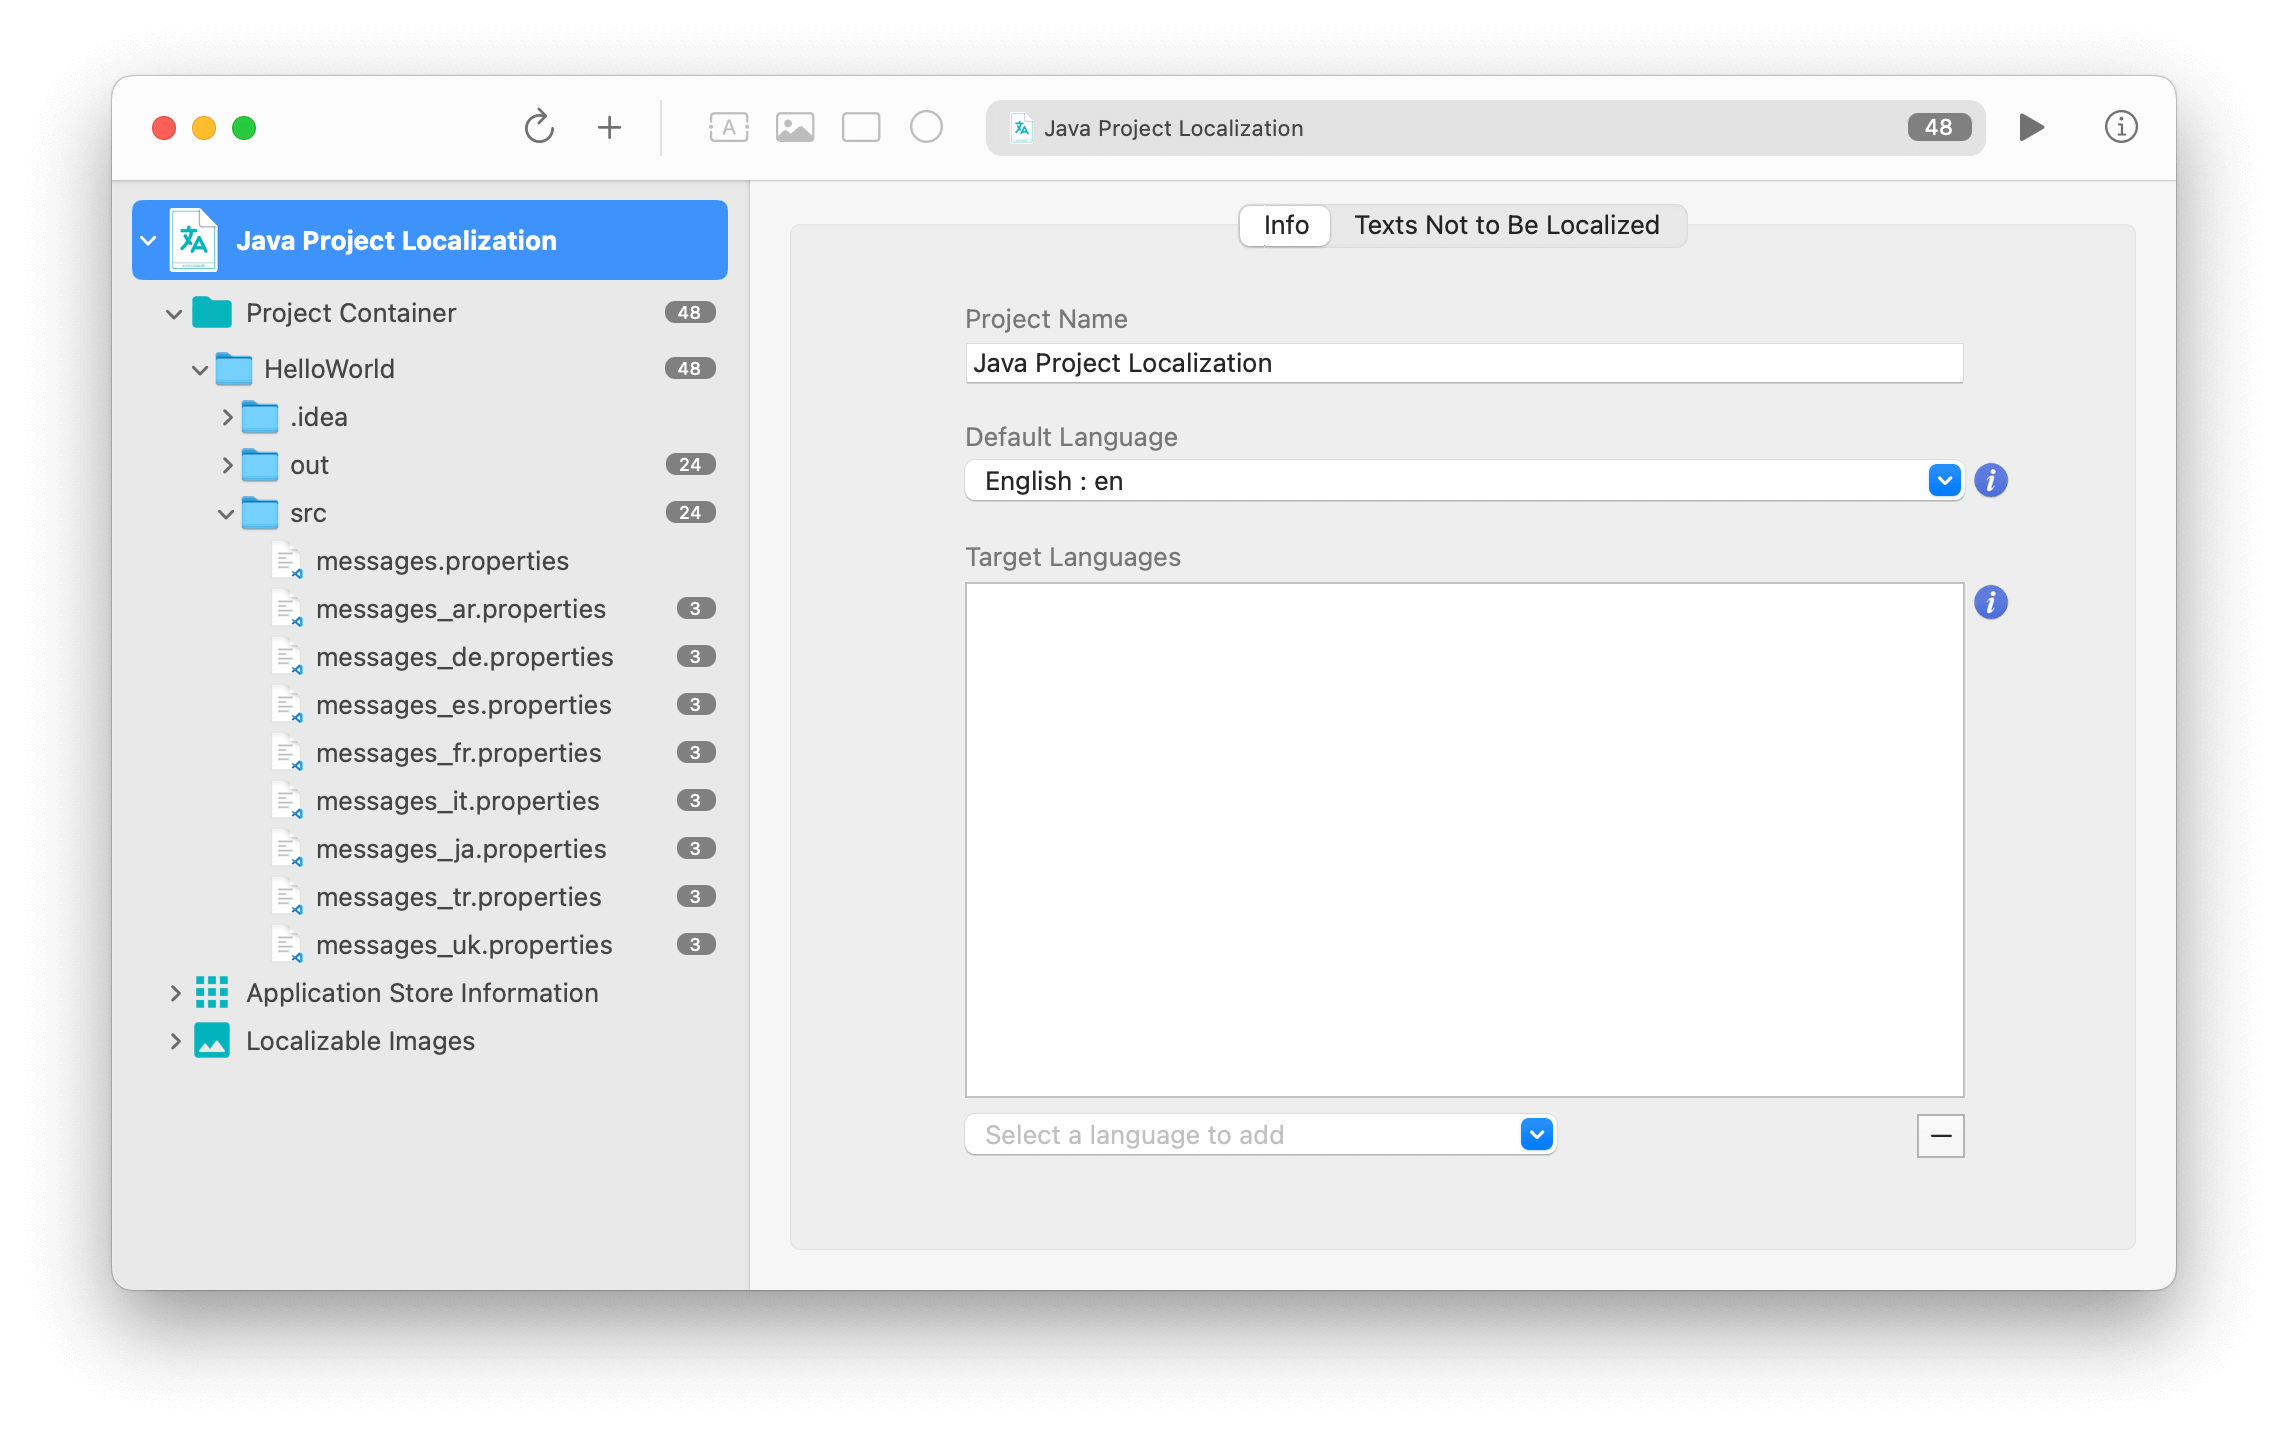
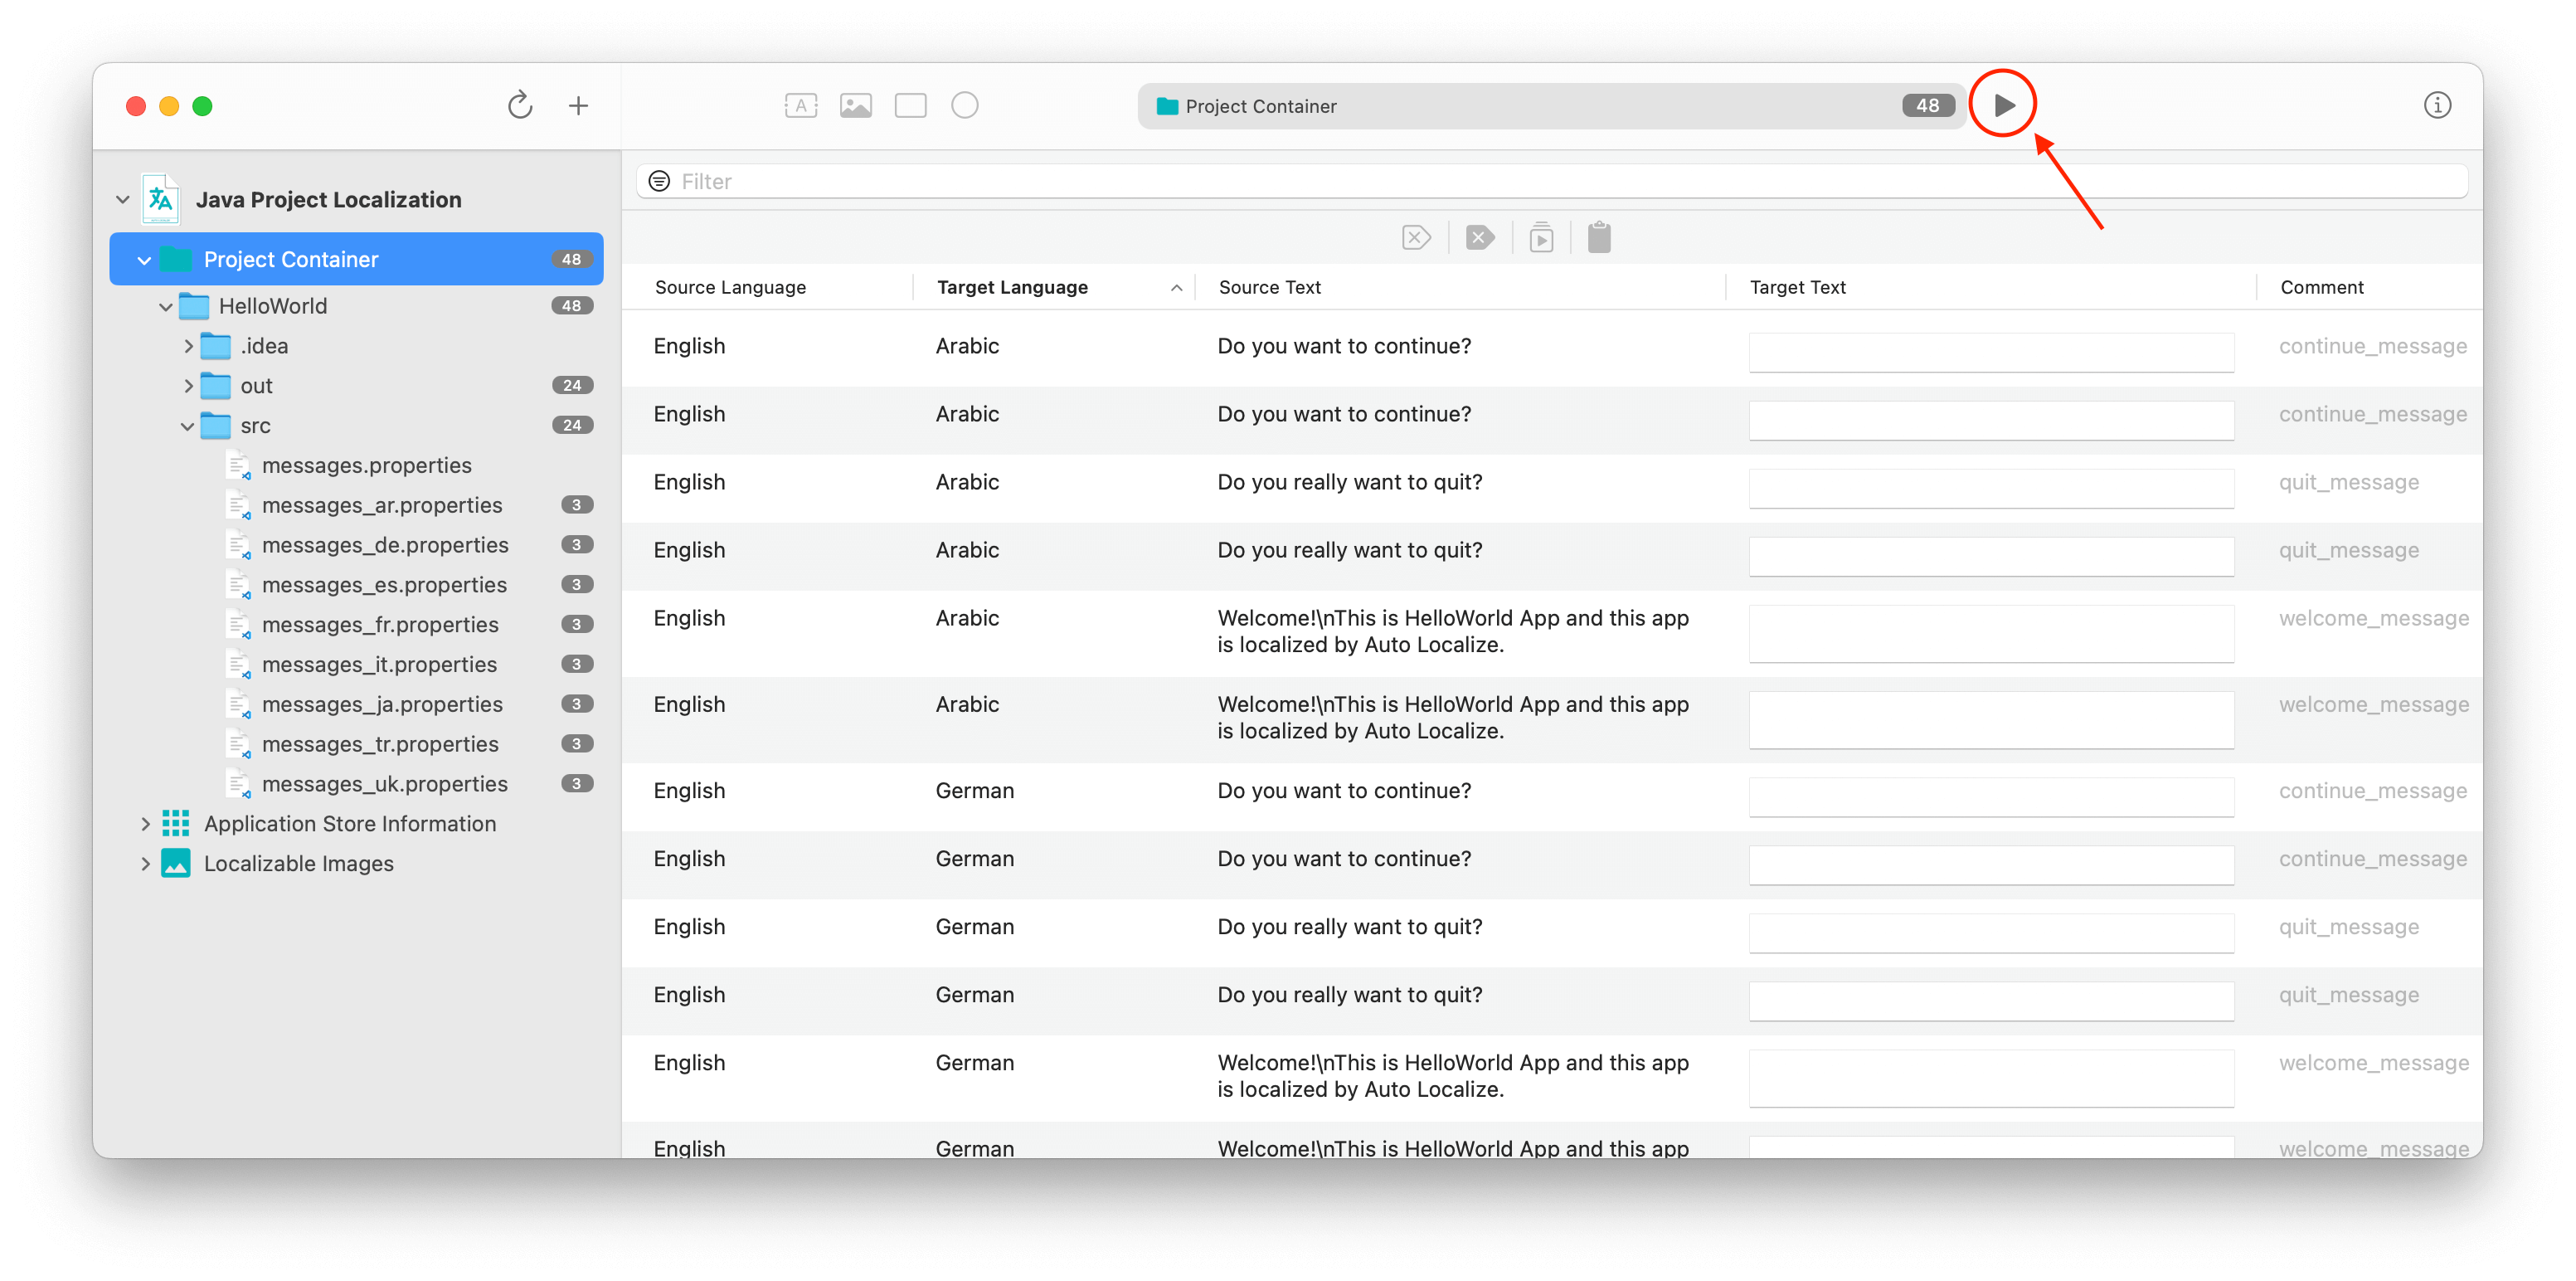
Add your Java project folder using the "Add Folder" menu.
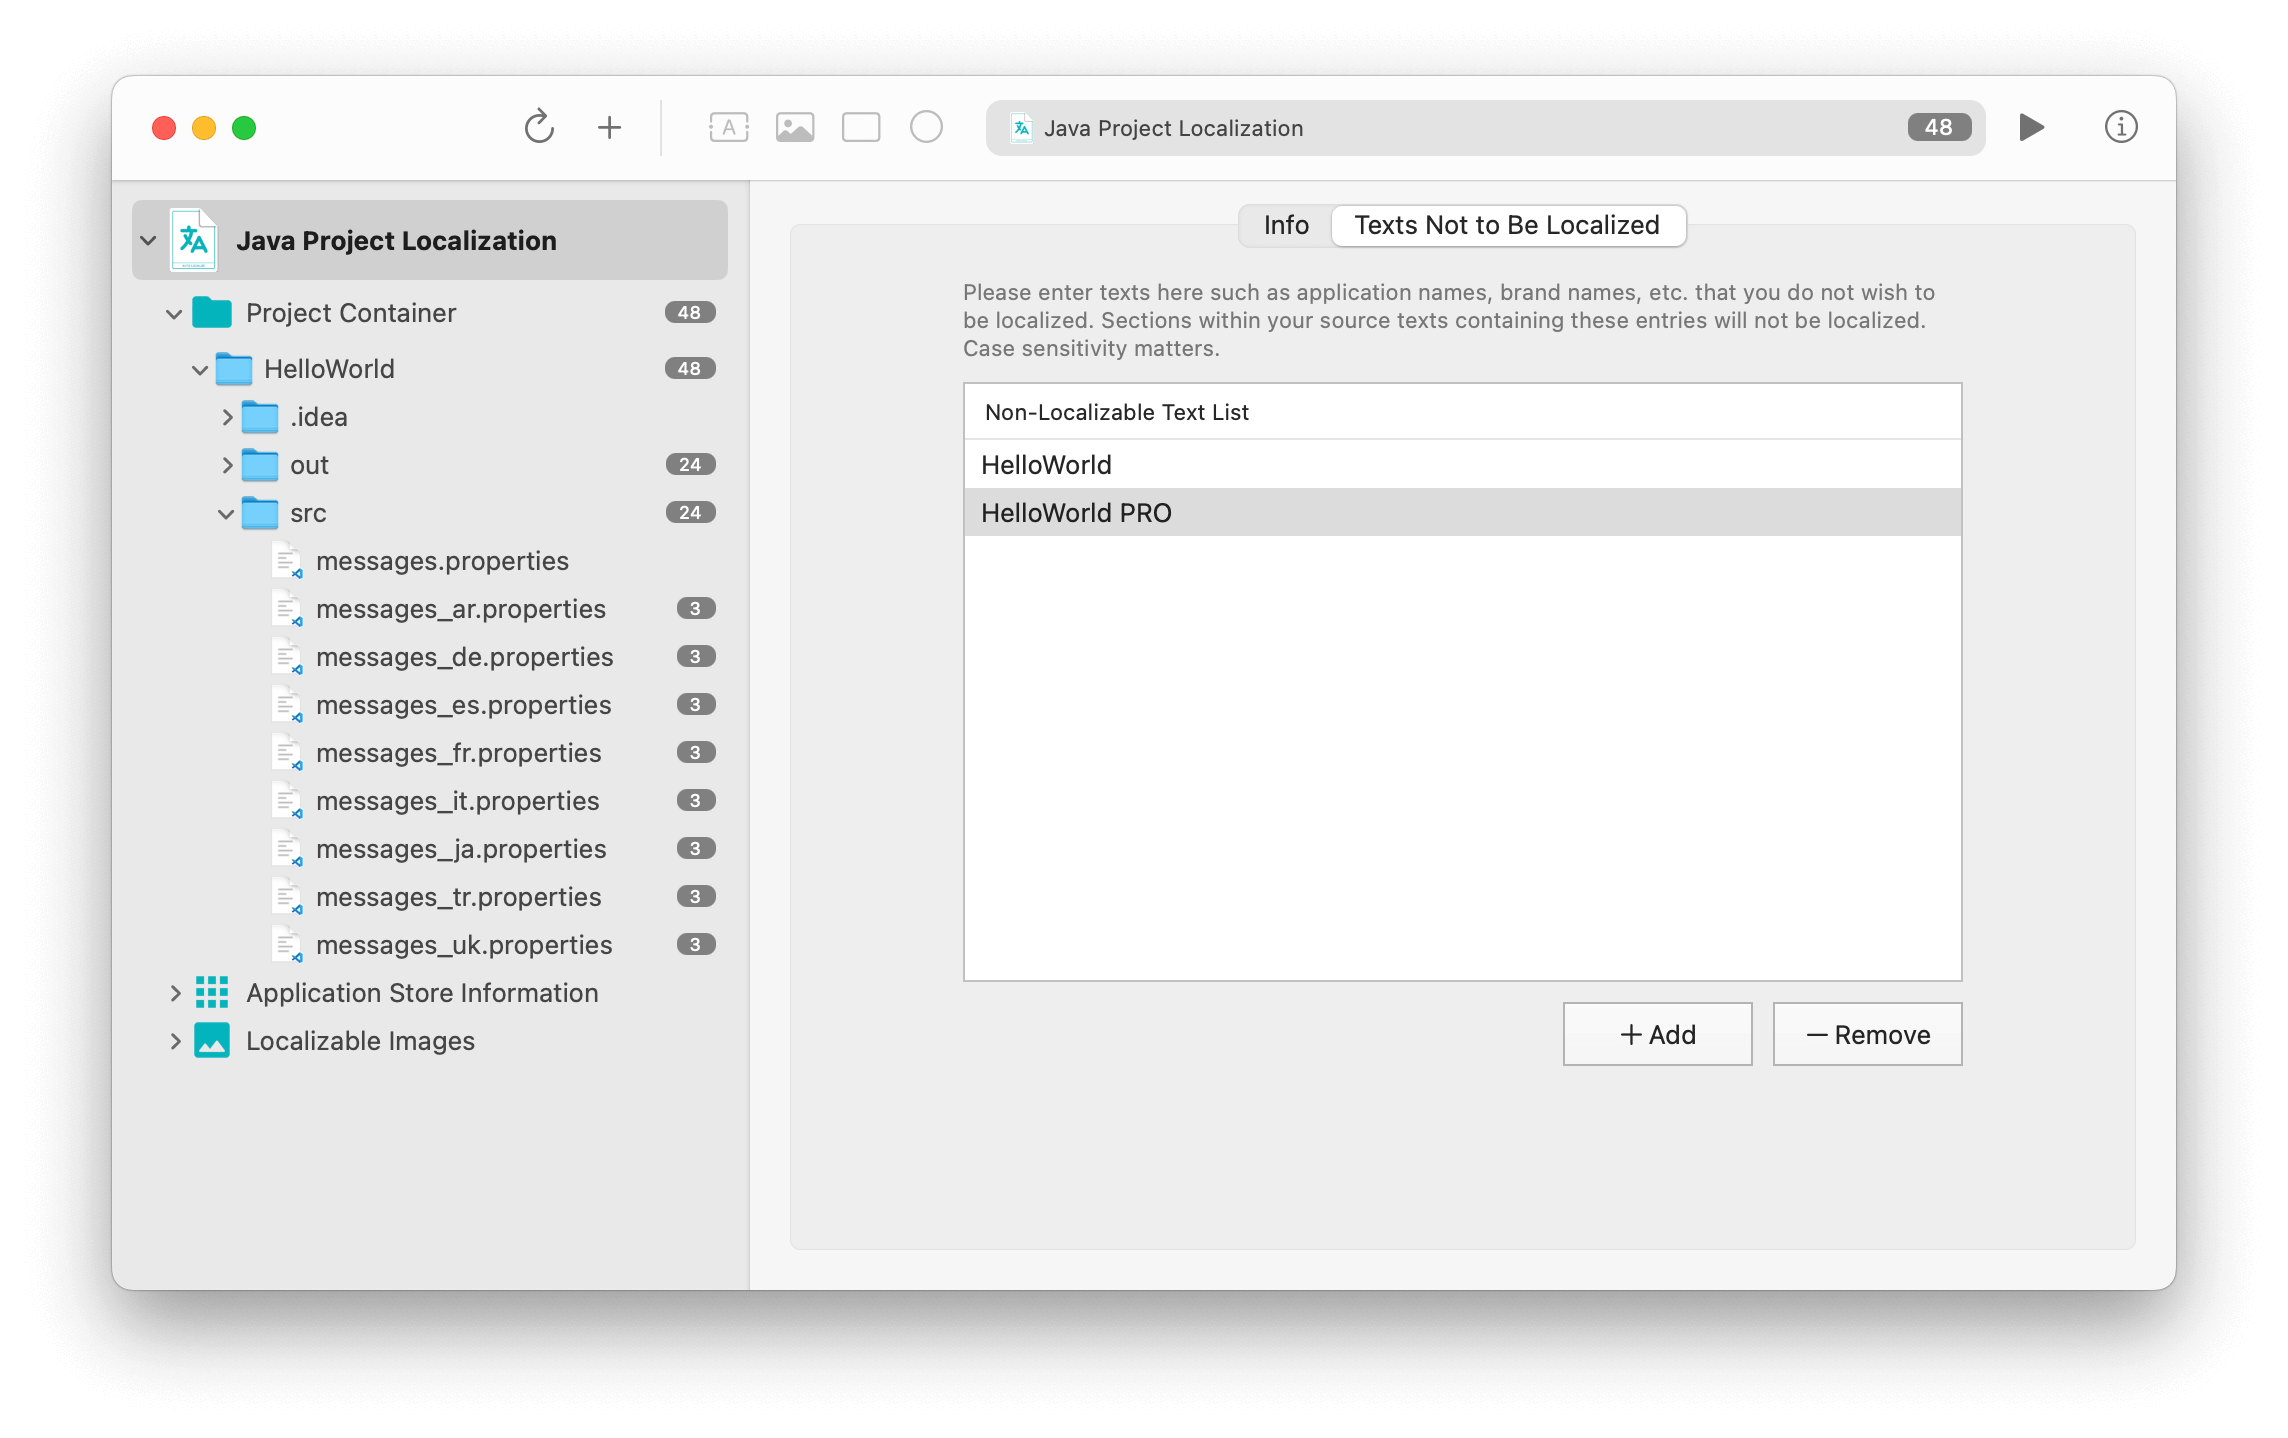
During localization, there may be text such as application names or brand names that you do not want to be translated. Enter such text in the 'Text Not to Be Localized' tab. The text you enter here will not be translated into other languages.
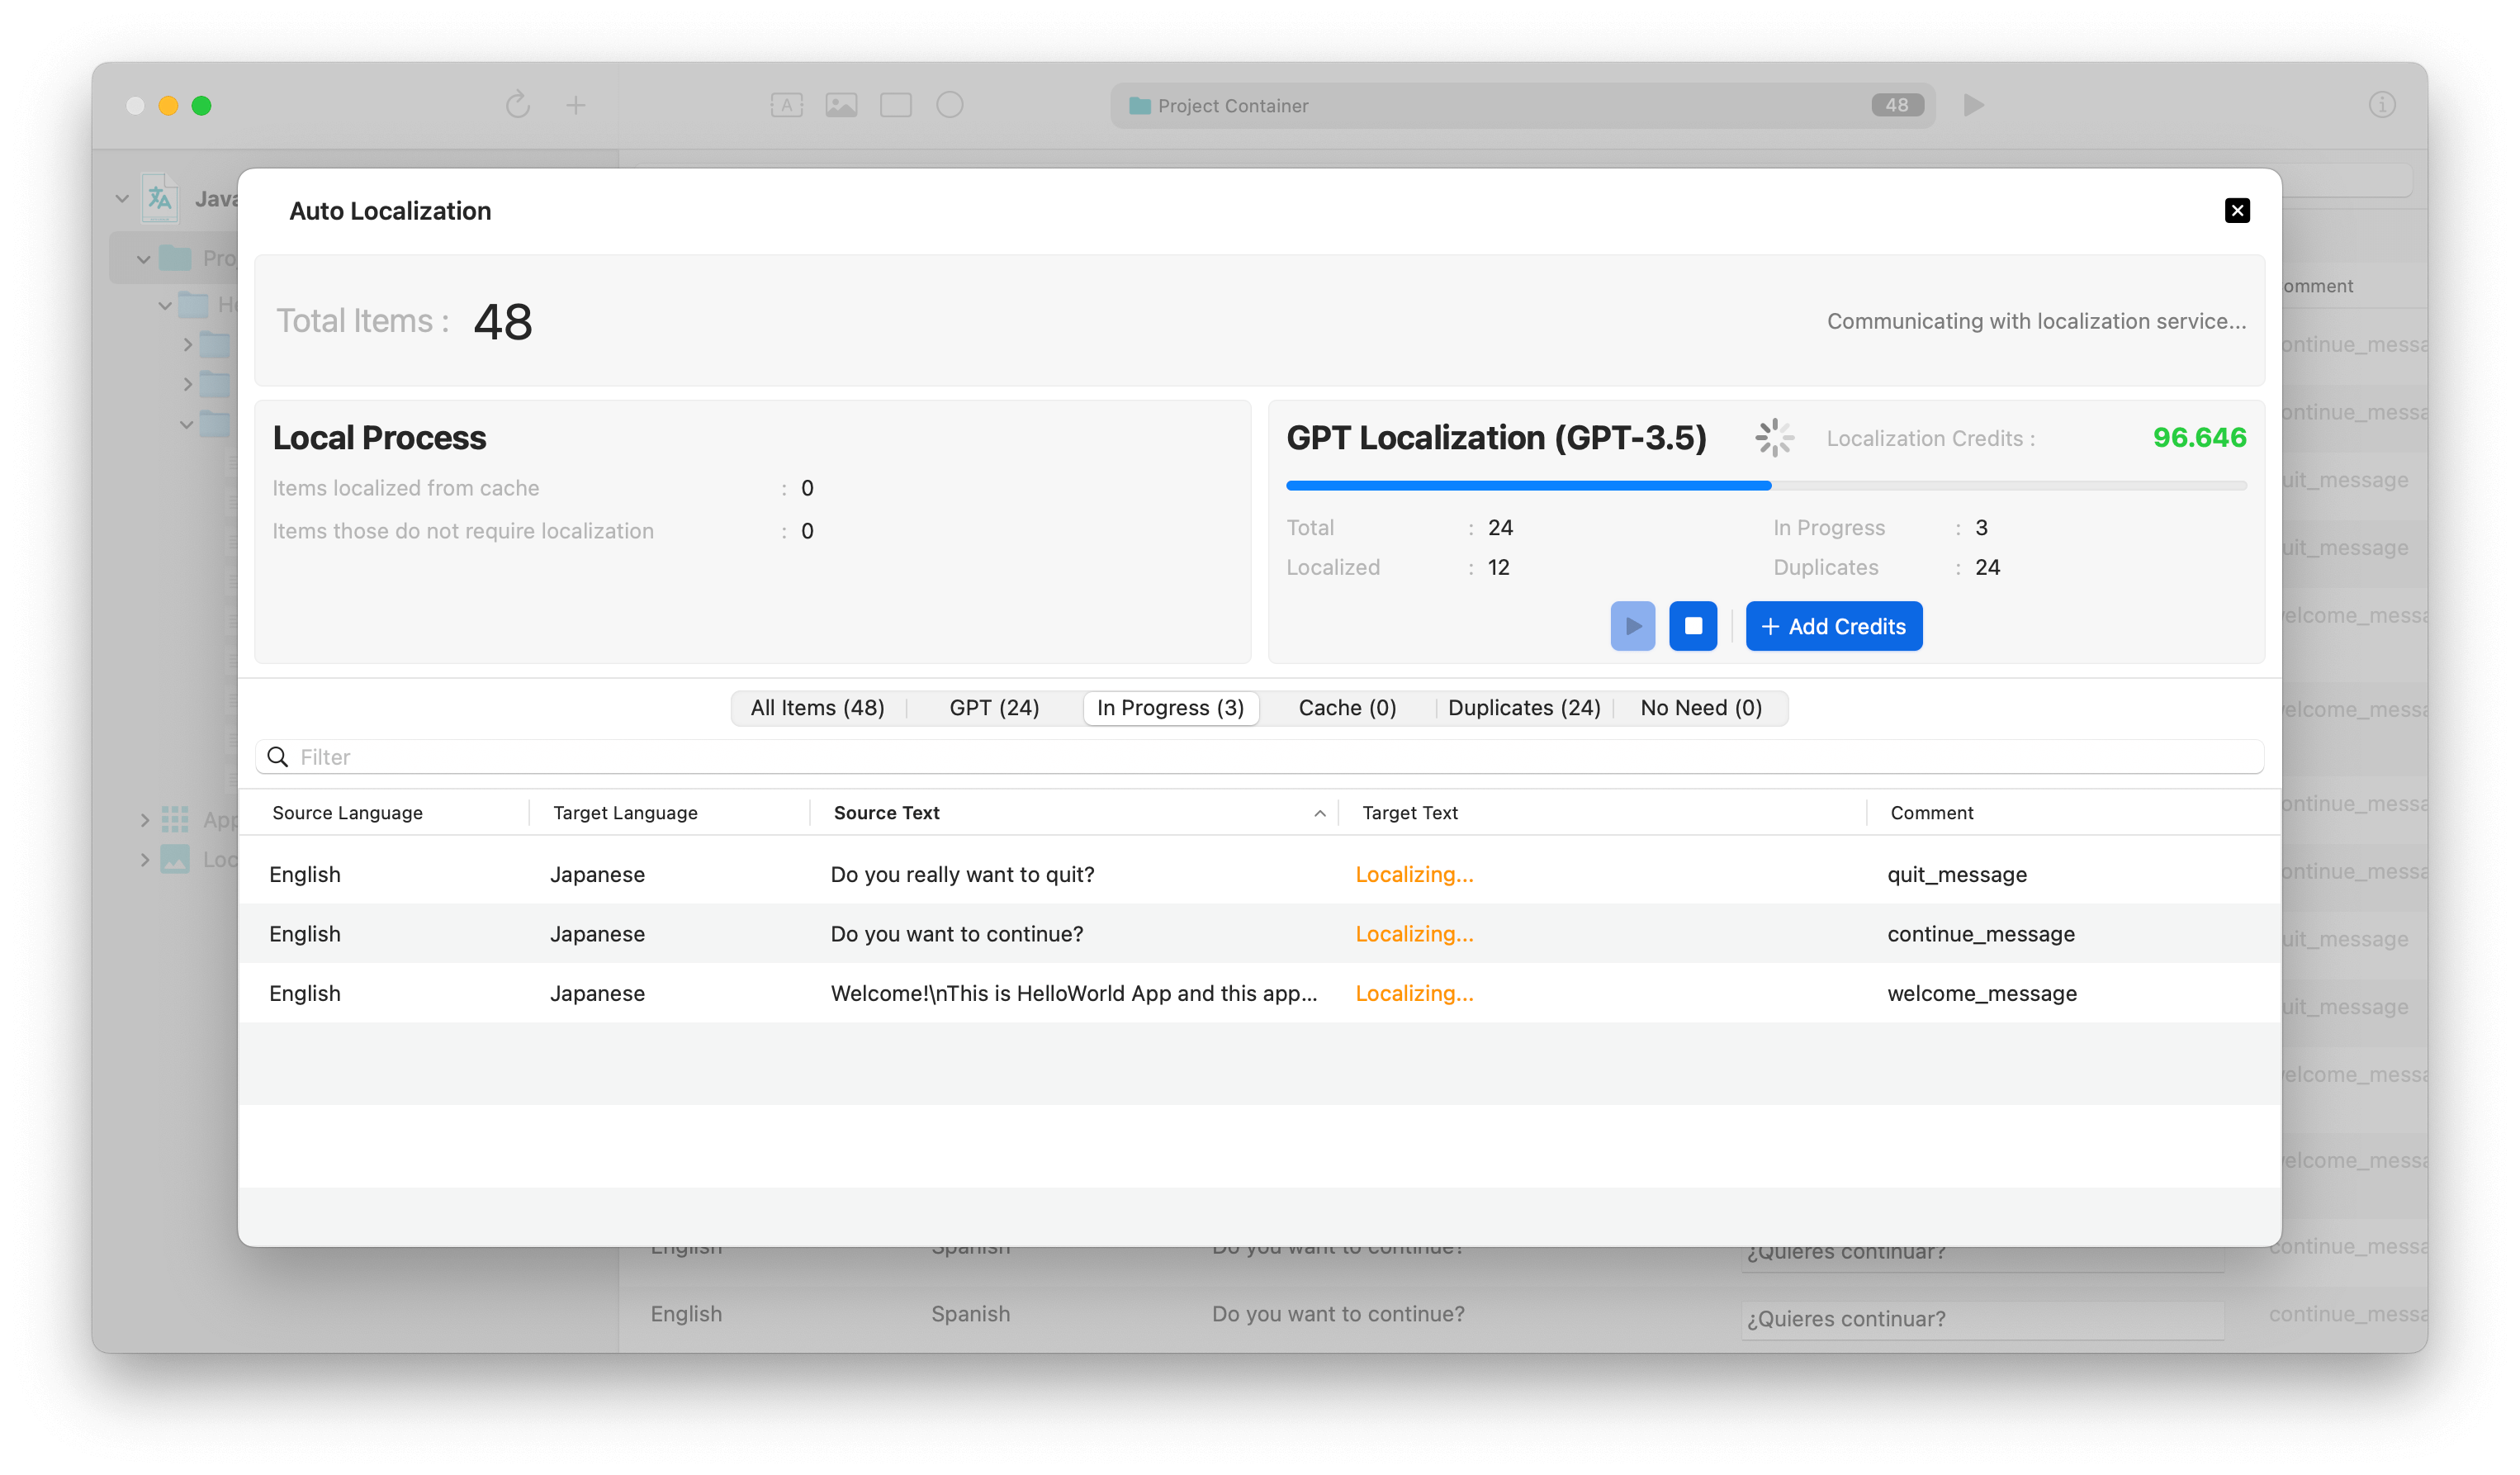
Open the automatic localization screen by clicking on the "Localize" button on the toolbar. All you have to do on this screen is to start the translation process by pressing the "Start" button. The application will localizable files under your project folder using Open AI's most advanced GPT models.


Your project is successfully localized. You can view all translations for target languages within the project.