
Schedule a demo with us
We can help you solve company communication.
You can translate your Articulate Rise 360 courses into other languages within minutes using the Auto Localize app, thereby rapidly increasing the audience for your courses.
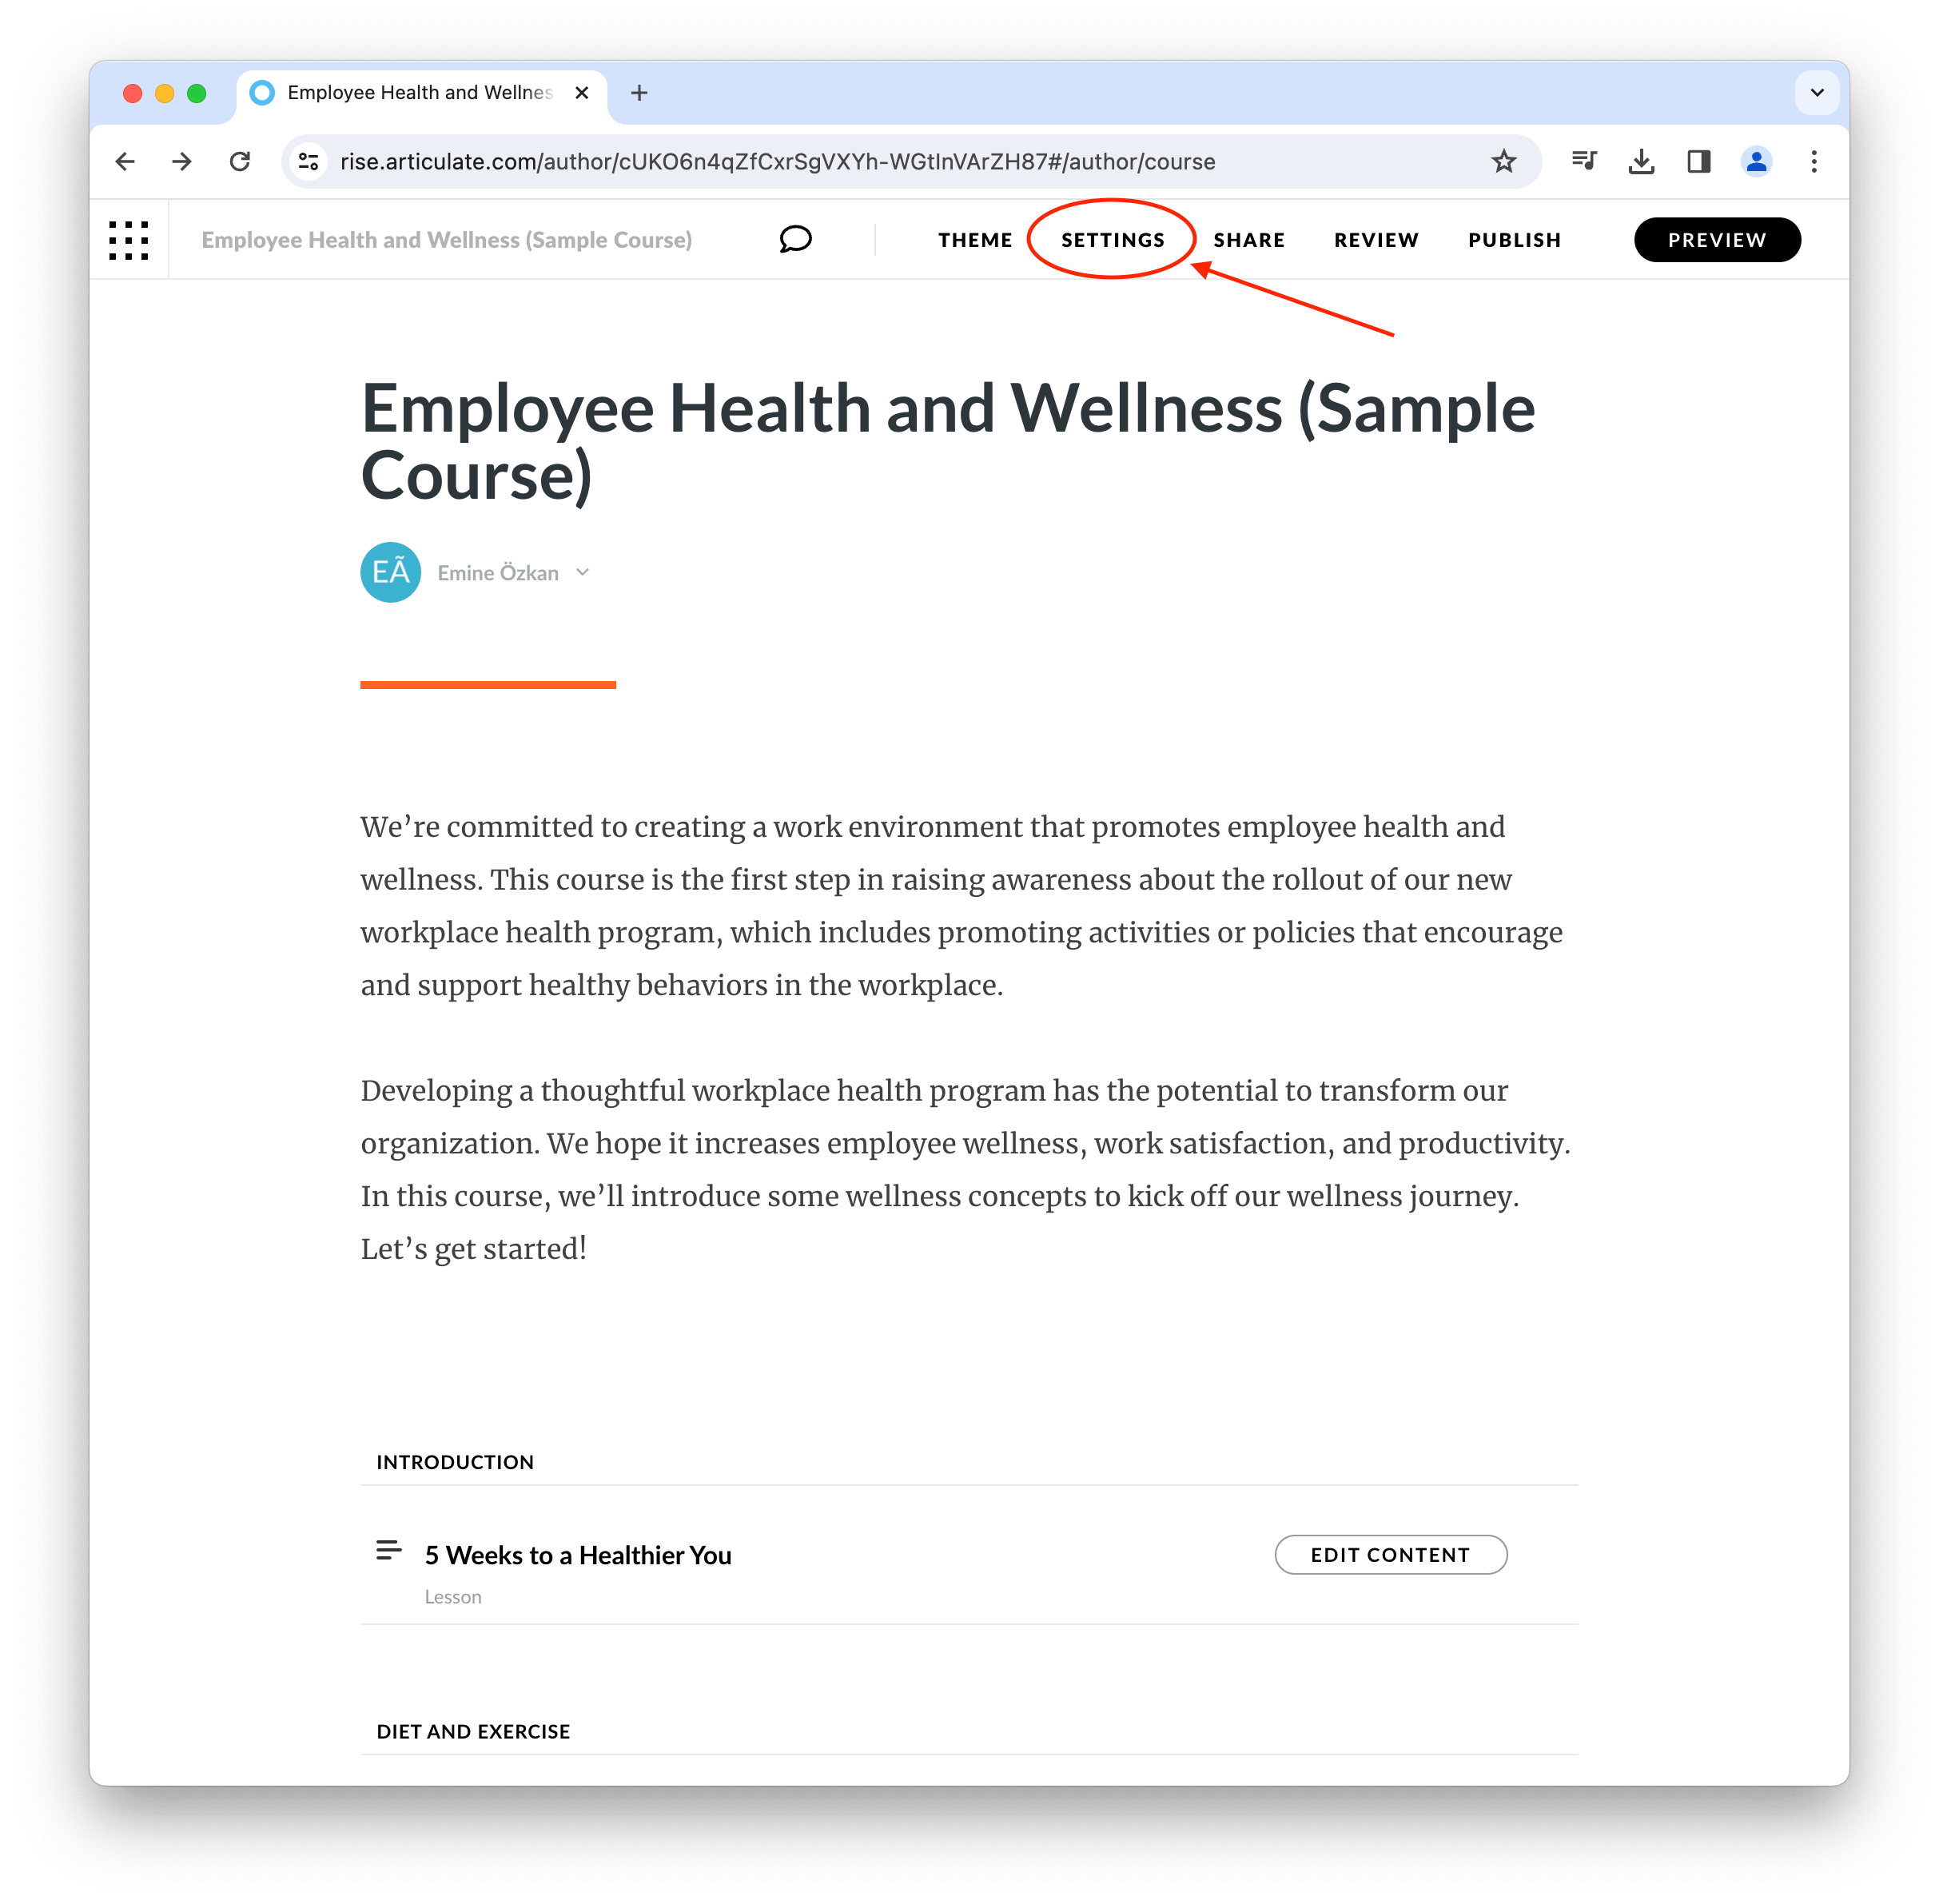
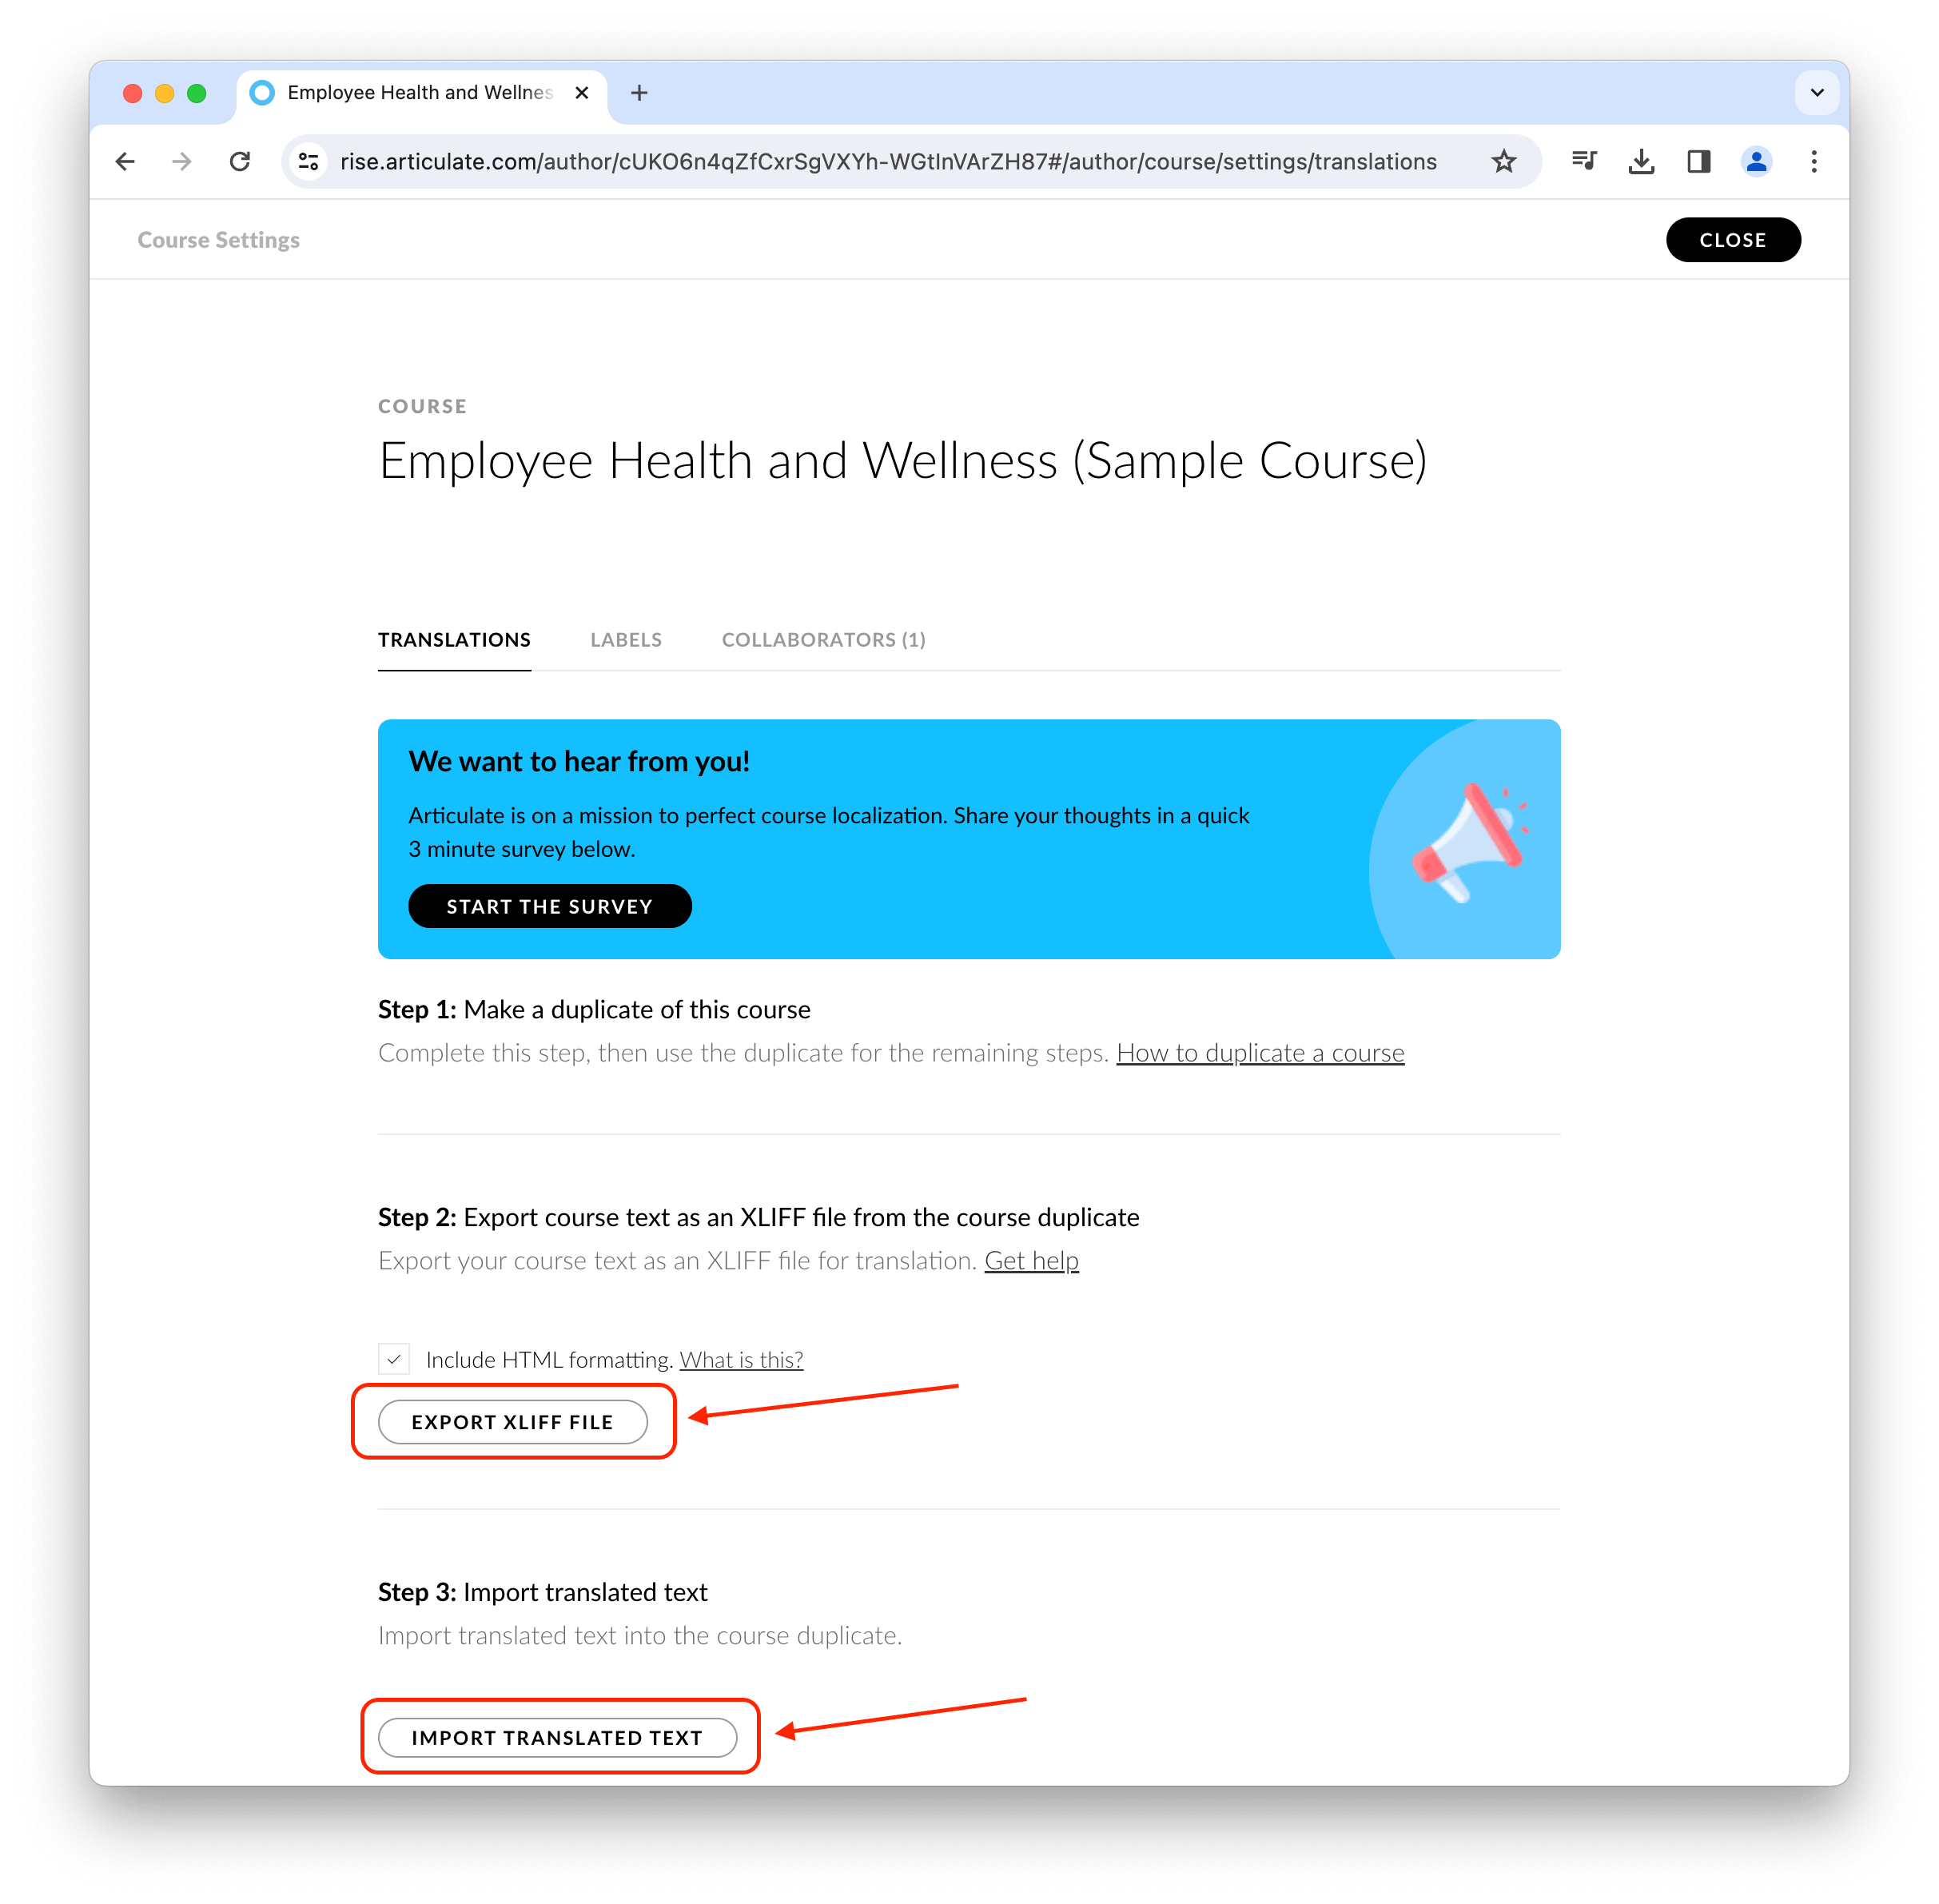
Export the XLIFF file using the "Export XLIFF File" button in the settings section of your Articulate Rise course.
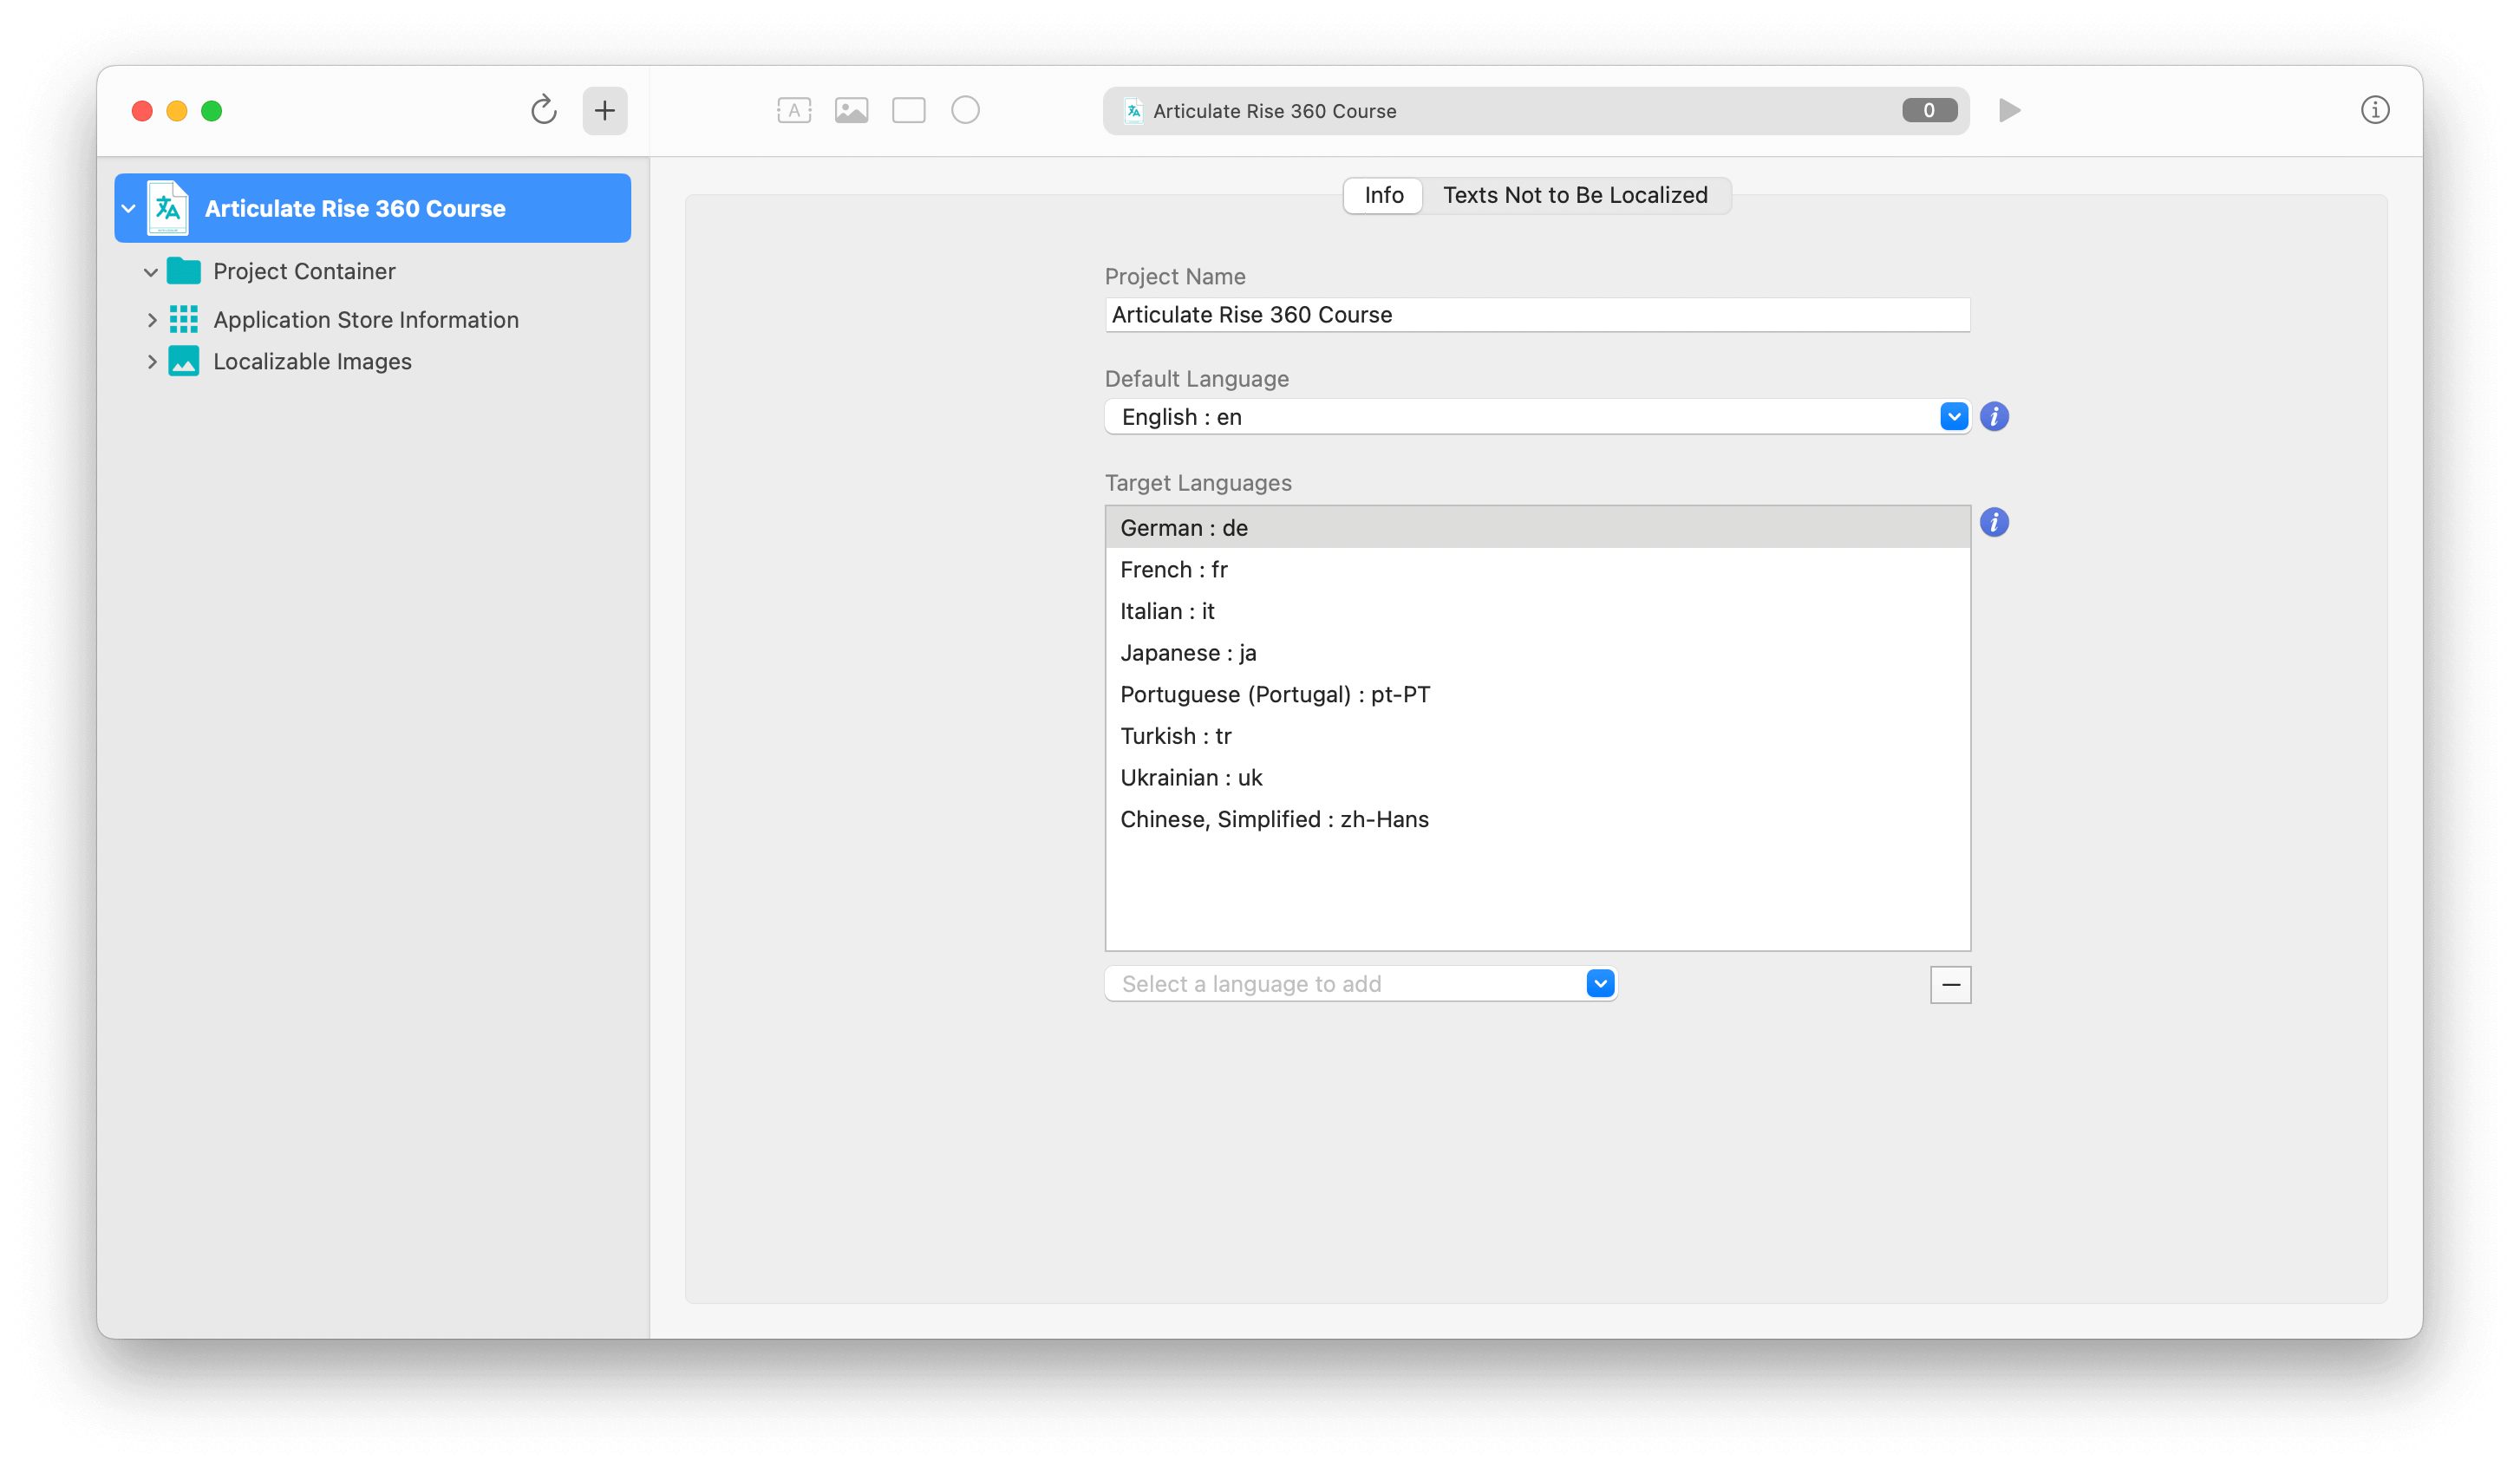
Open the Auto Localize app and create a new project. Give your project a suitable name. Set the default language value to the language your course is written in. Then, add the languages you want to translate your course into to the target languages section.
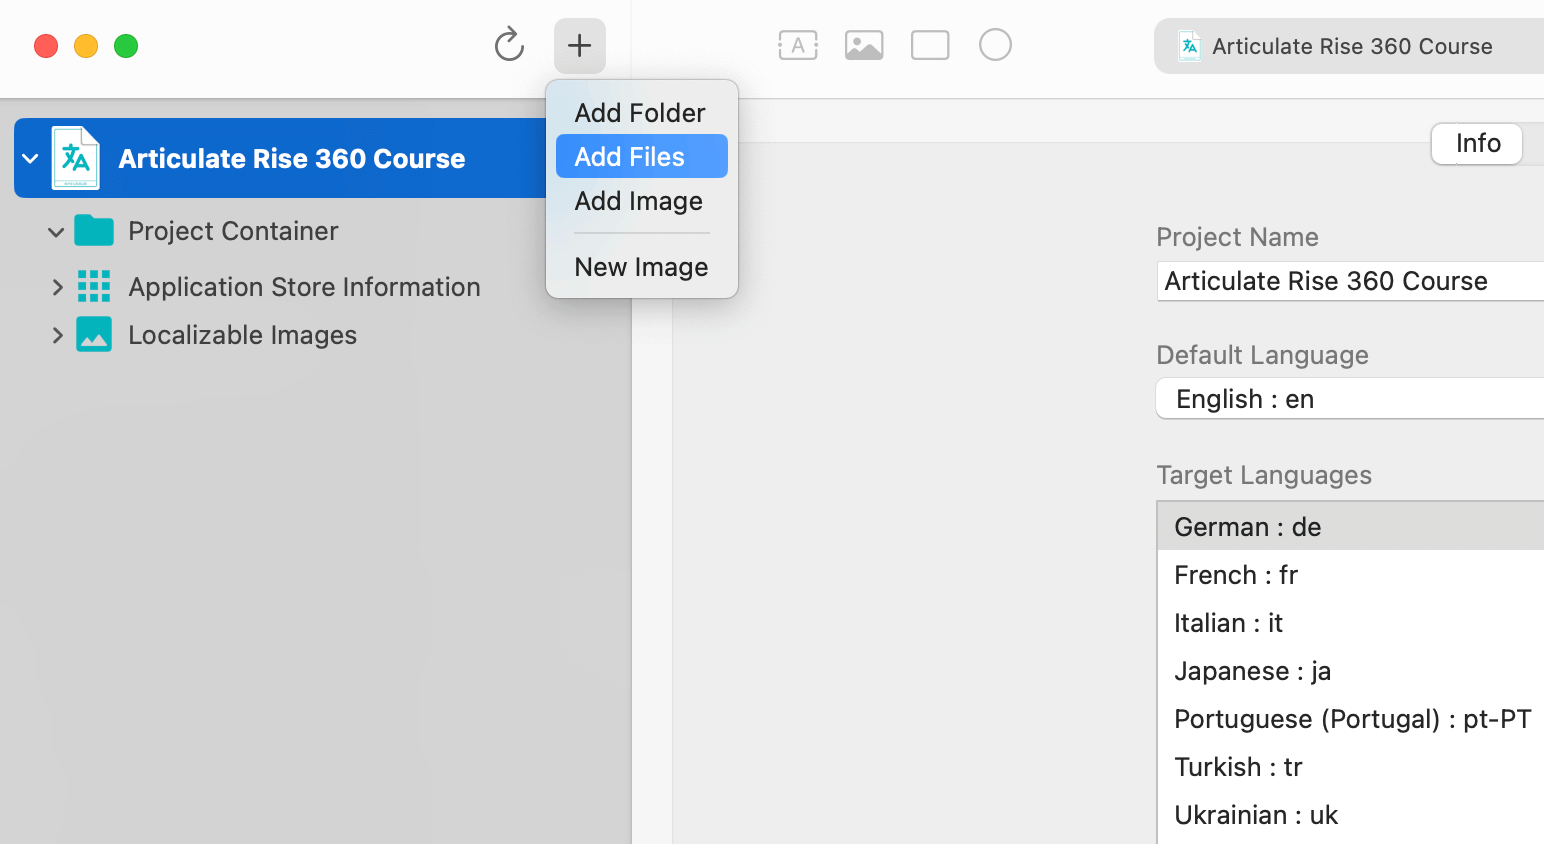
Add the XLIFF file you exported from the Articulate Rise page to your project using the "Add Files" menu.
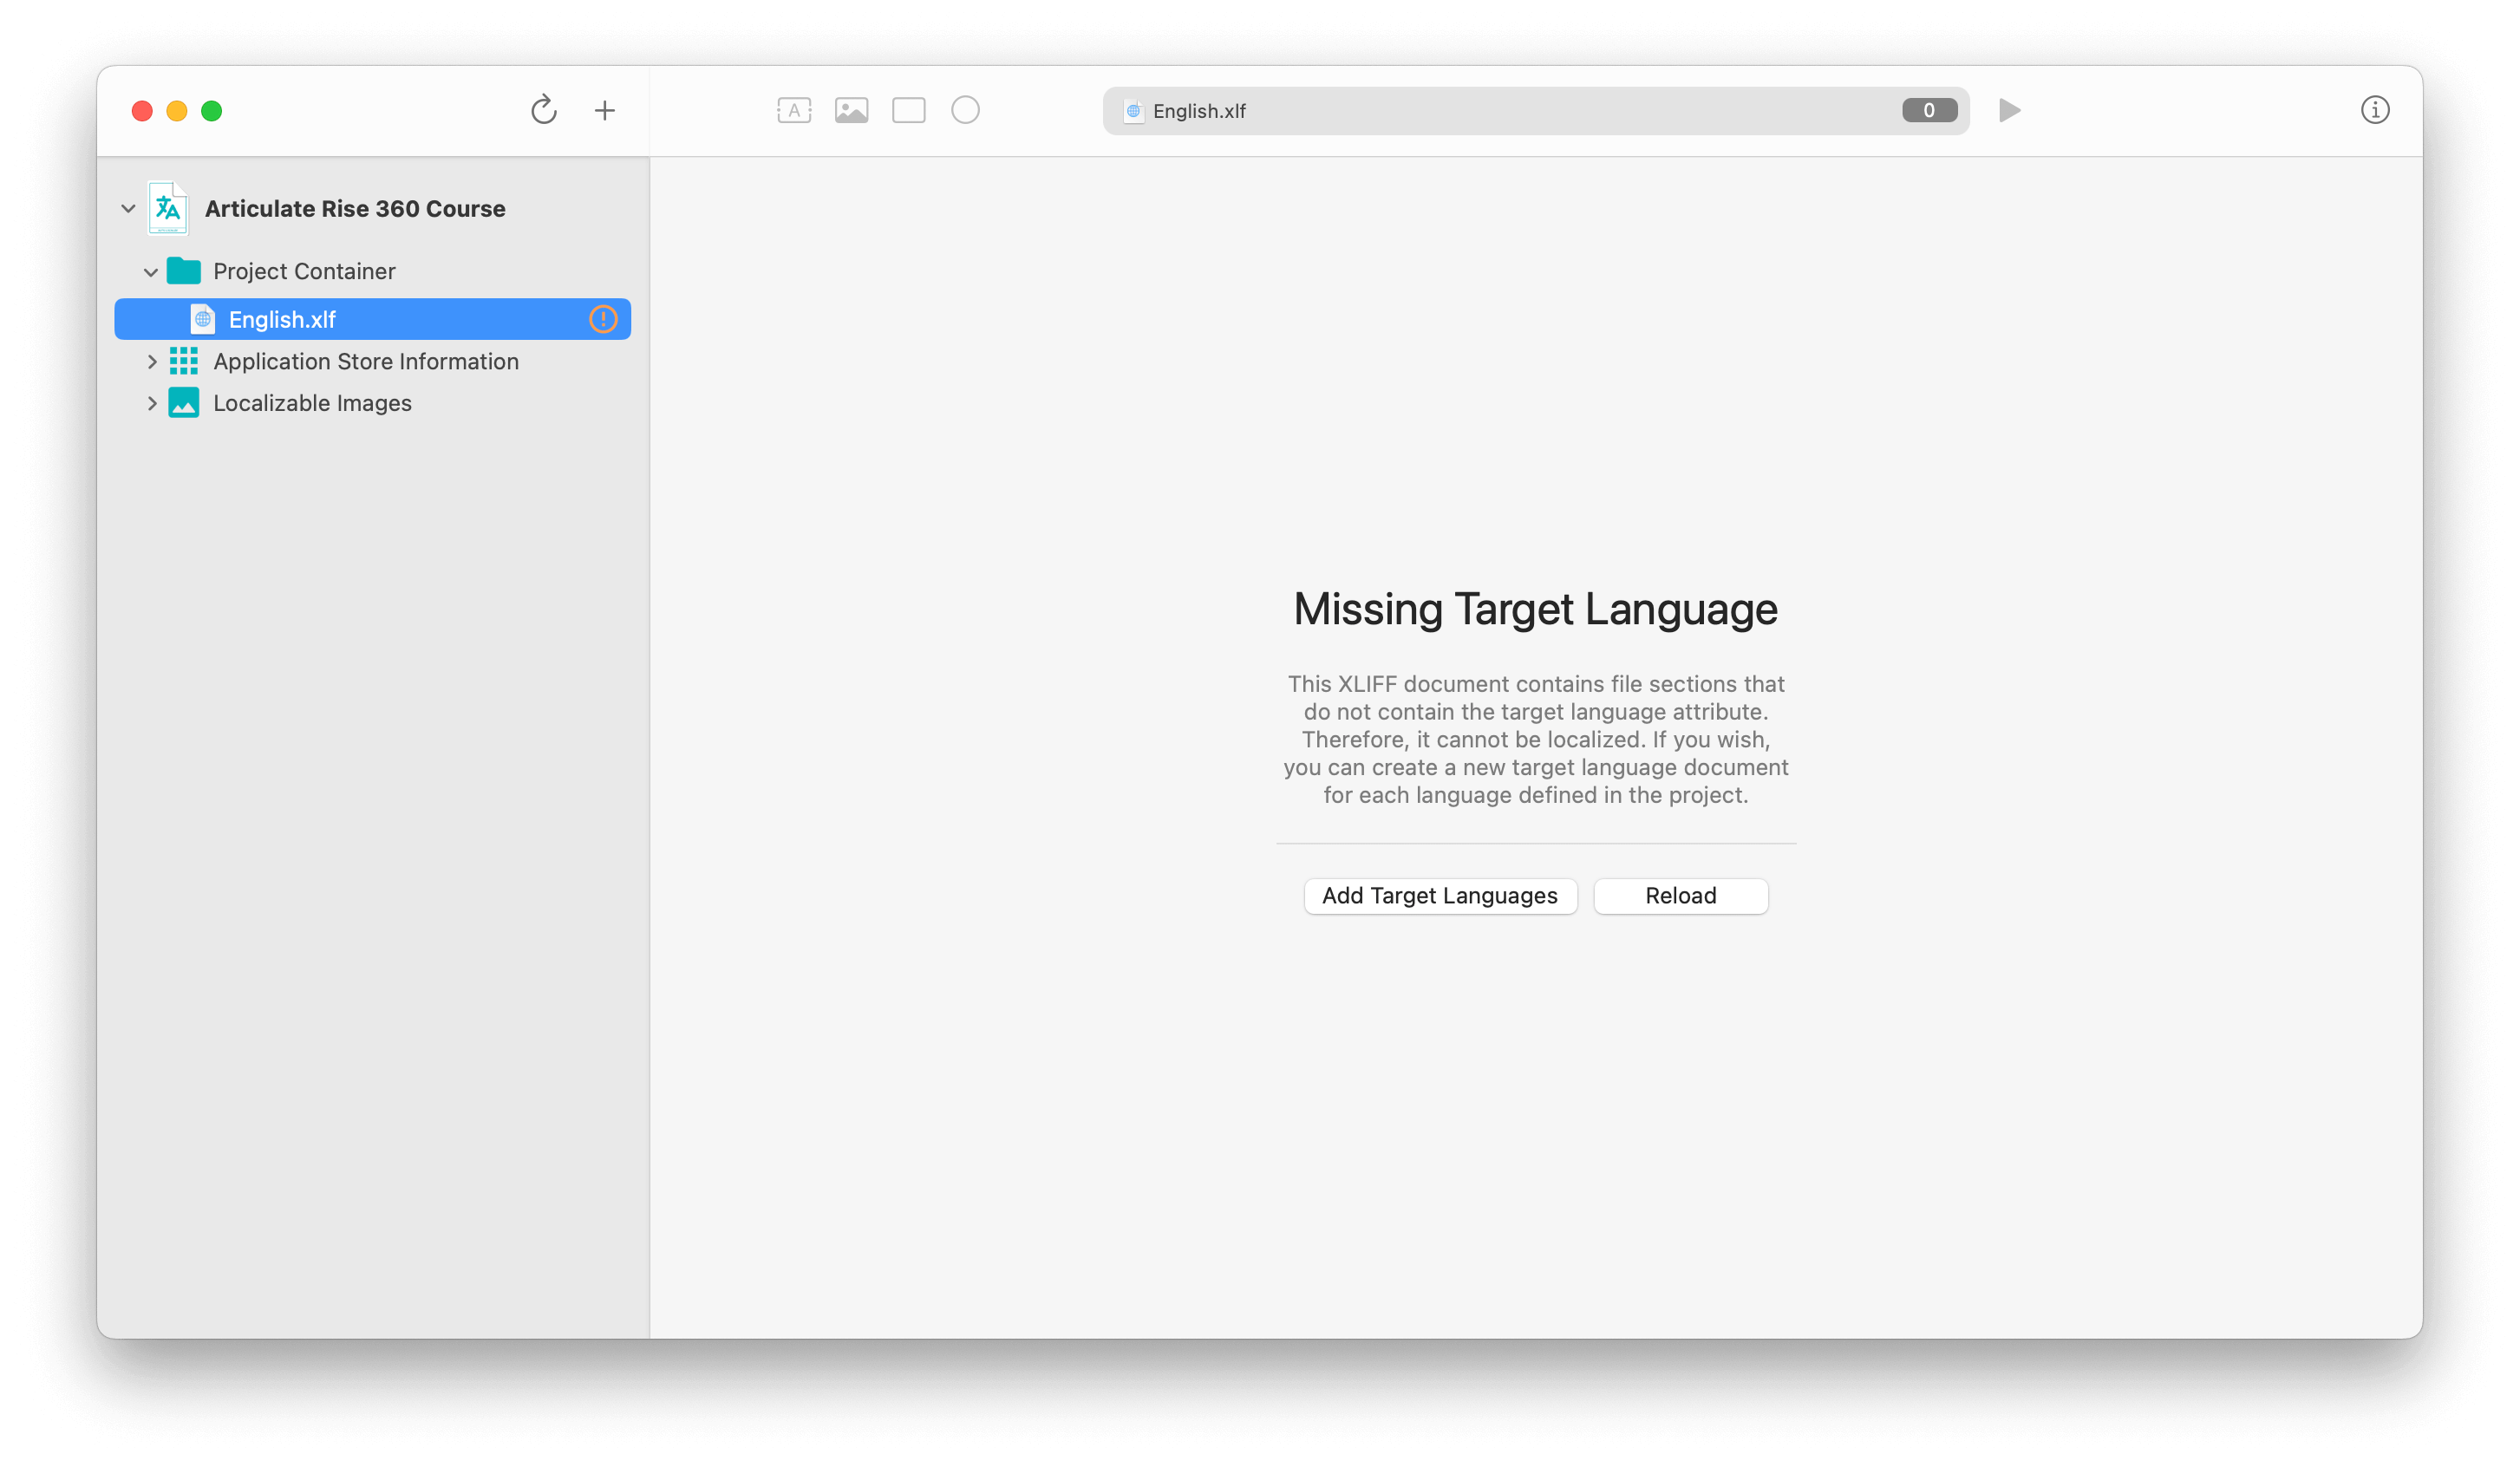
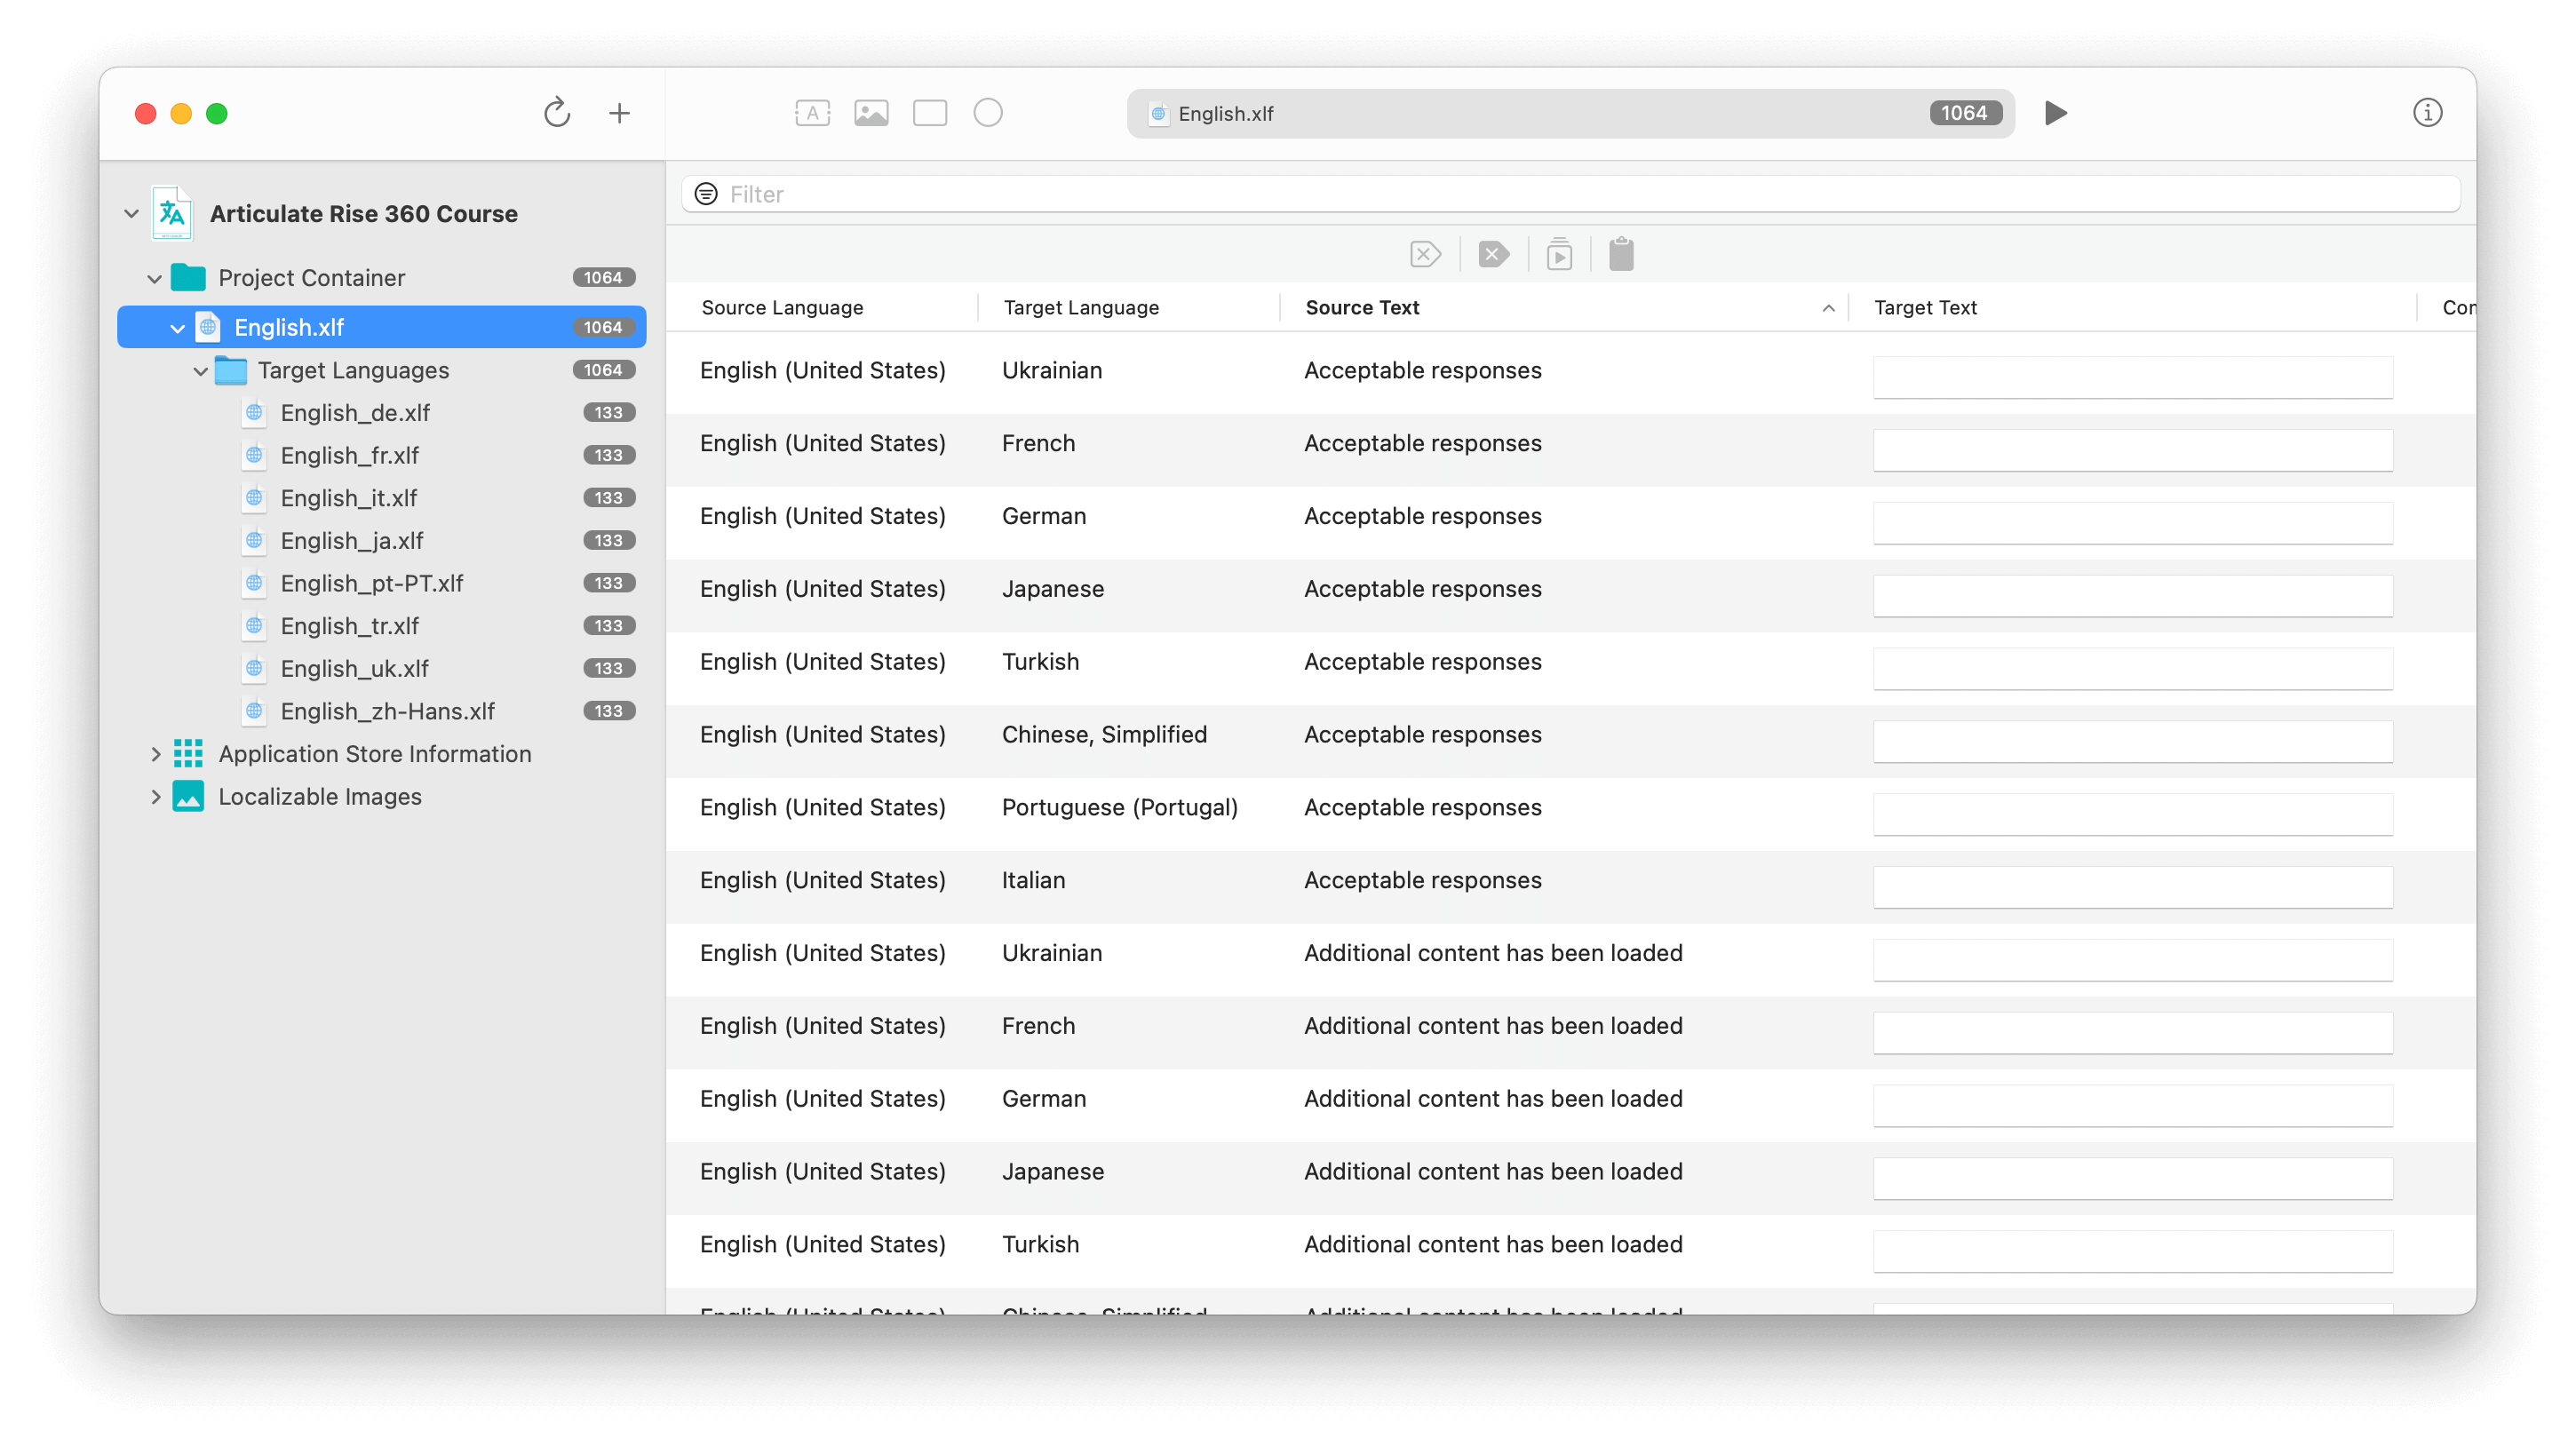
When you add the file to the project, the app will warn you that there is no target languages information in the file. At this point, use the "Add Target Languages" button to create a separate XLIFF file for each target language you have set in the project settings.
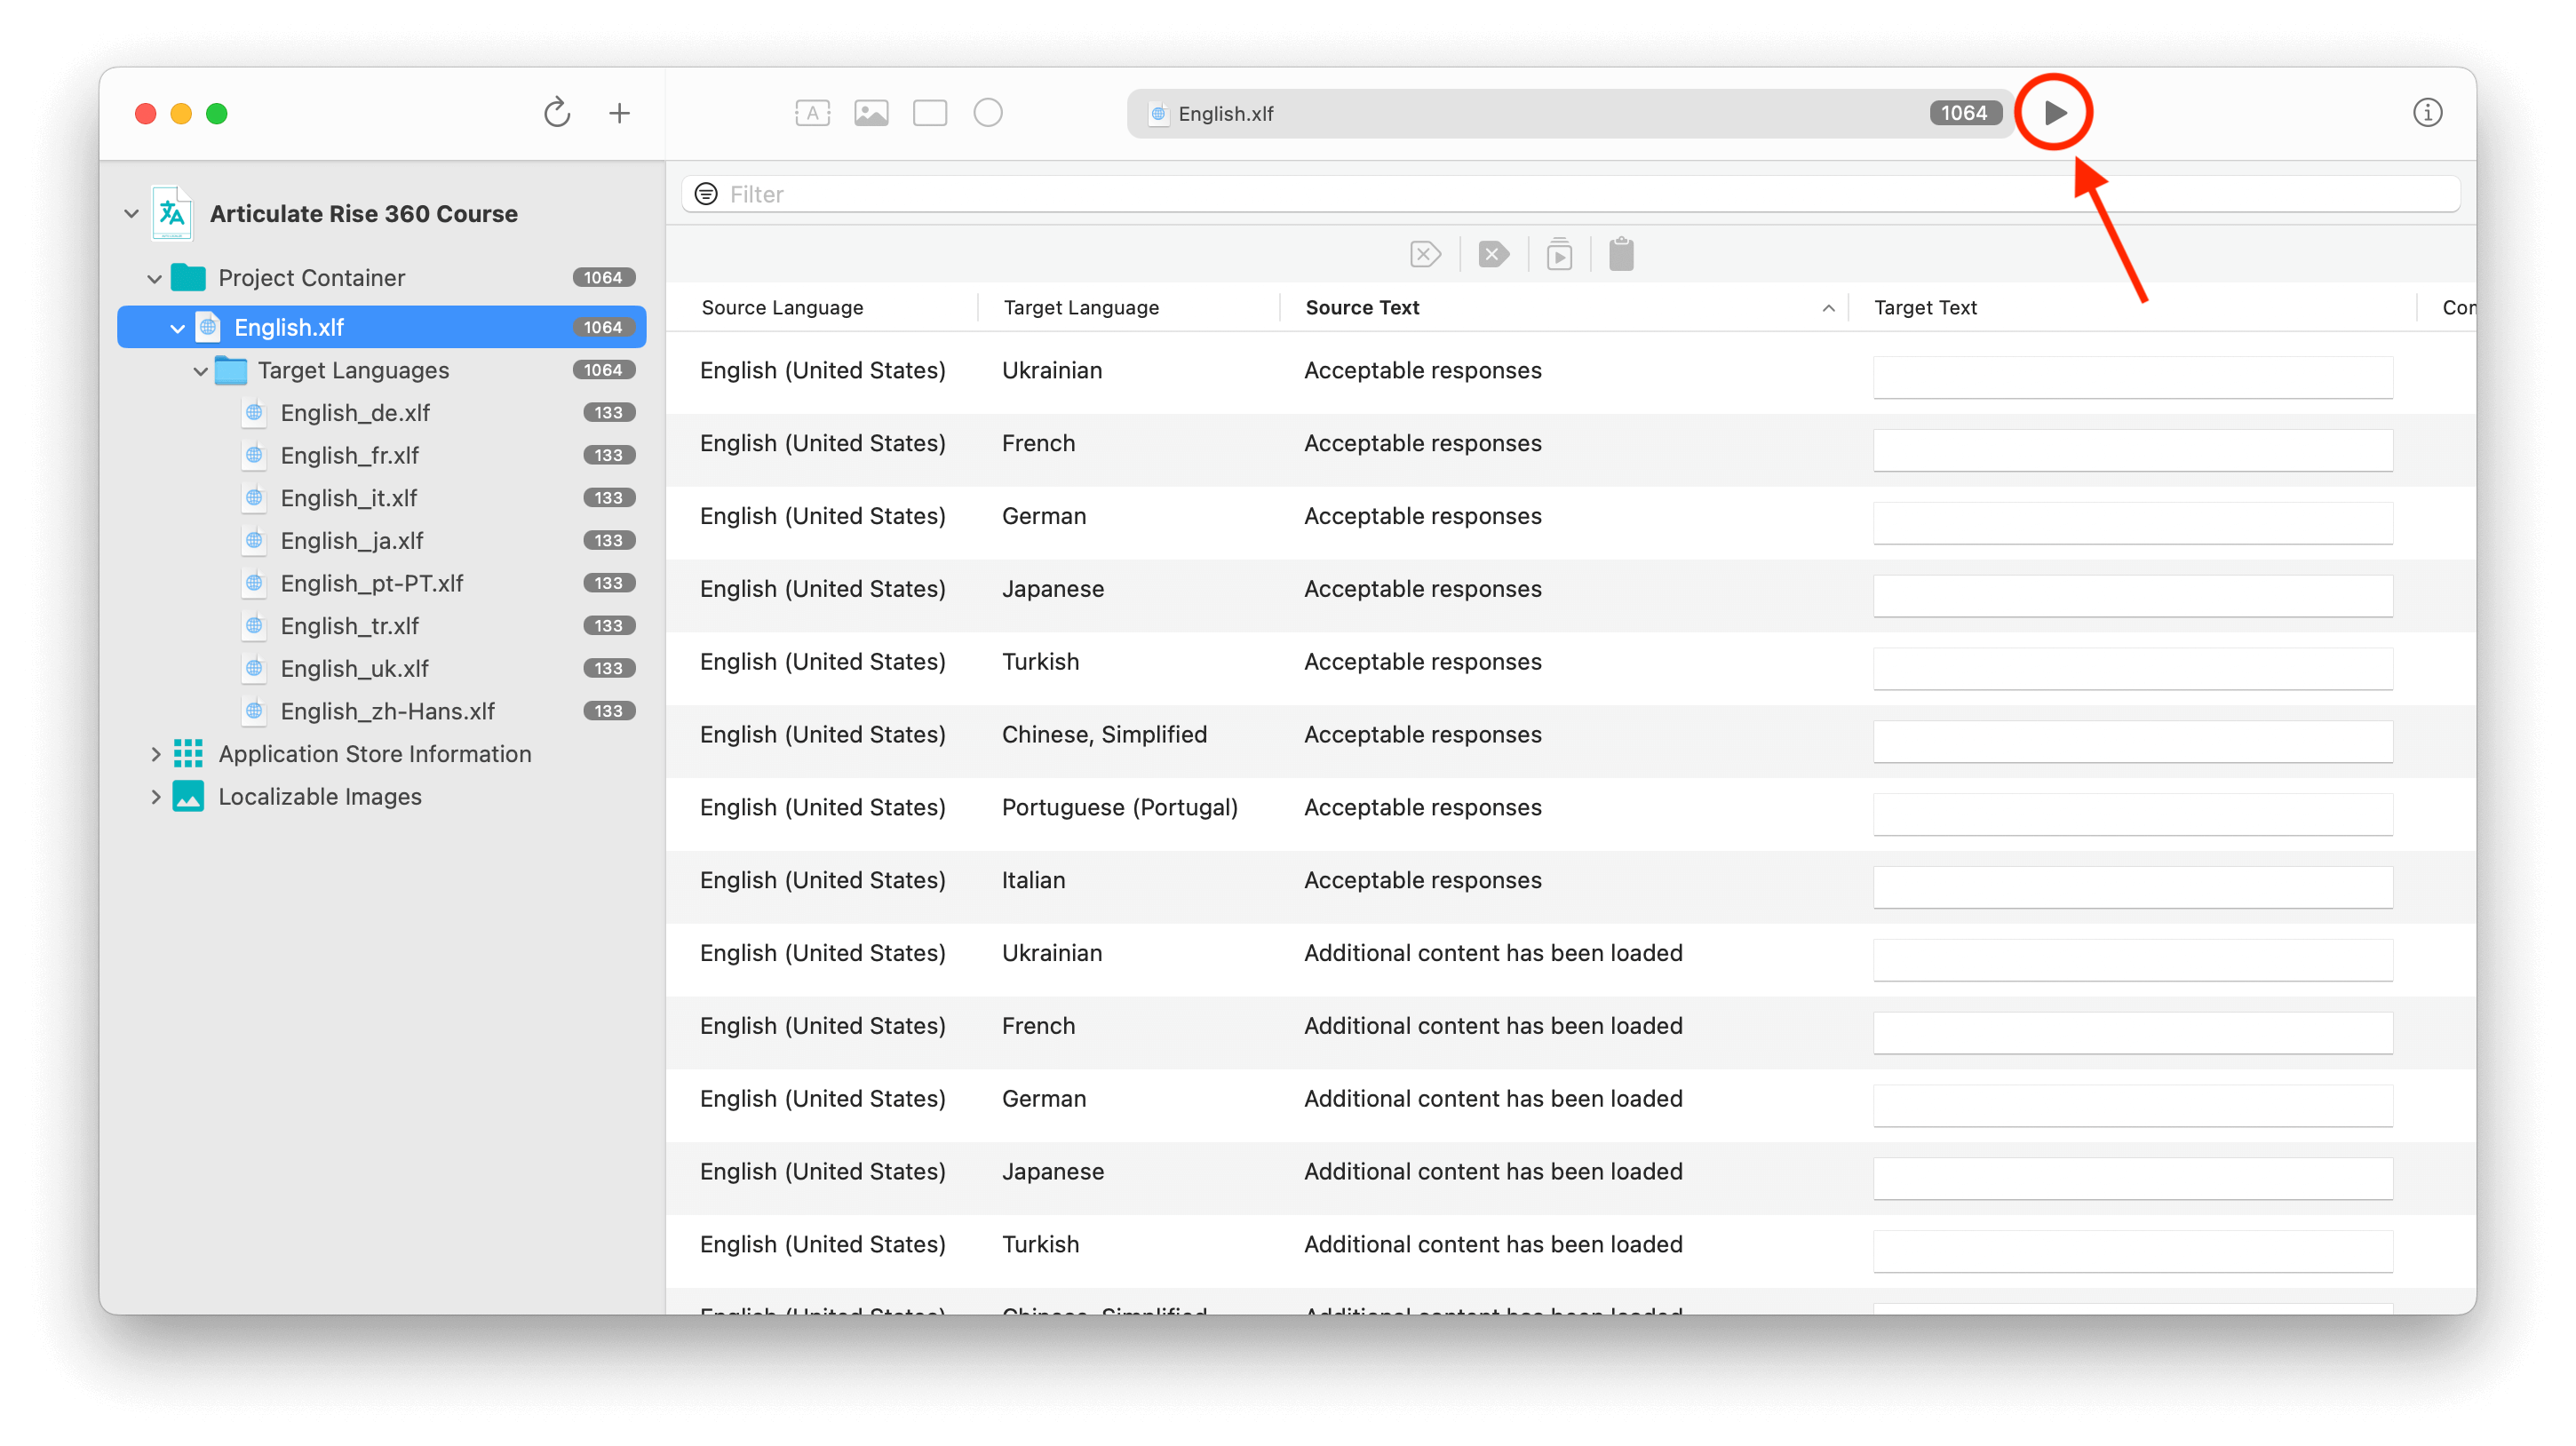
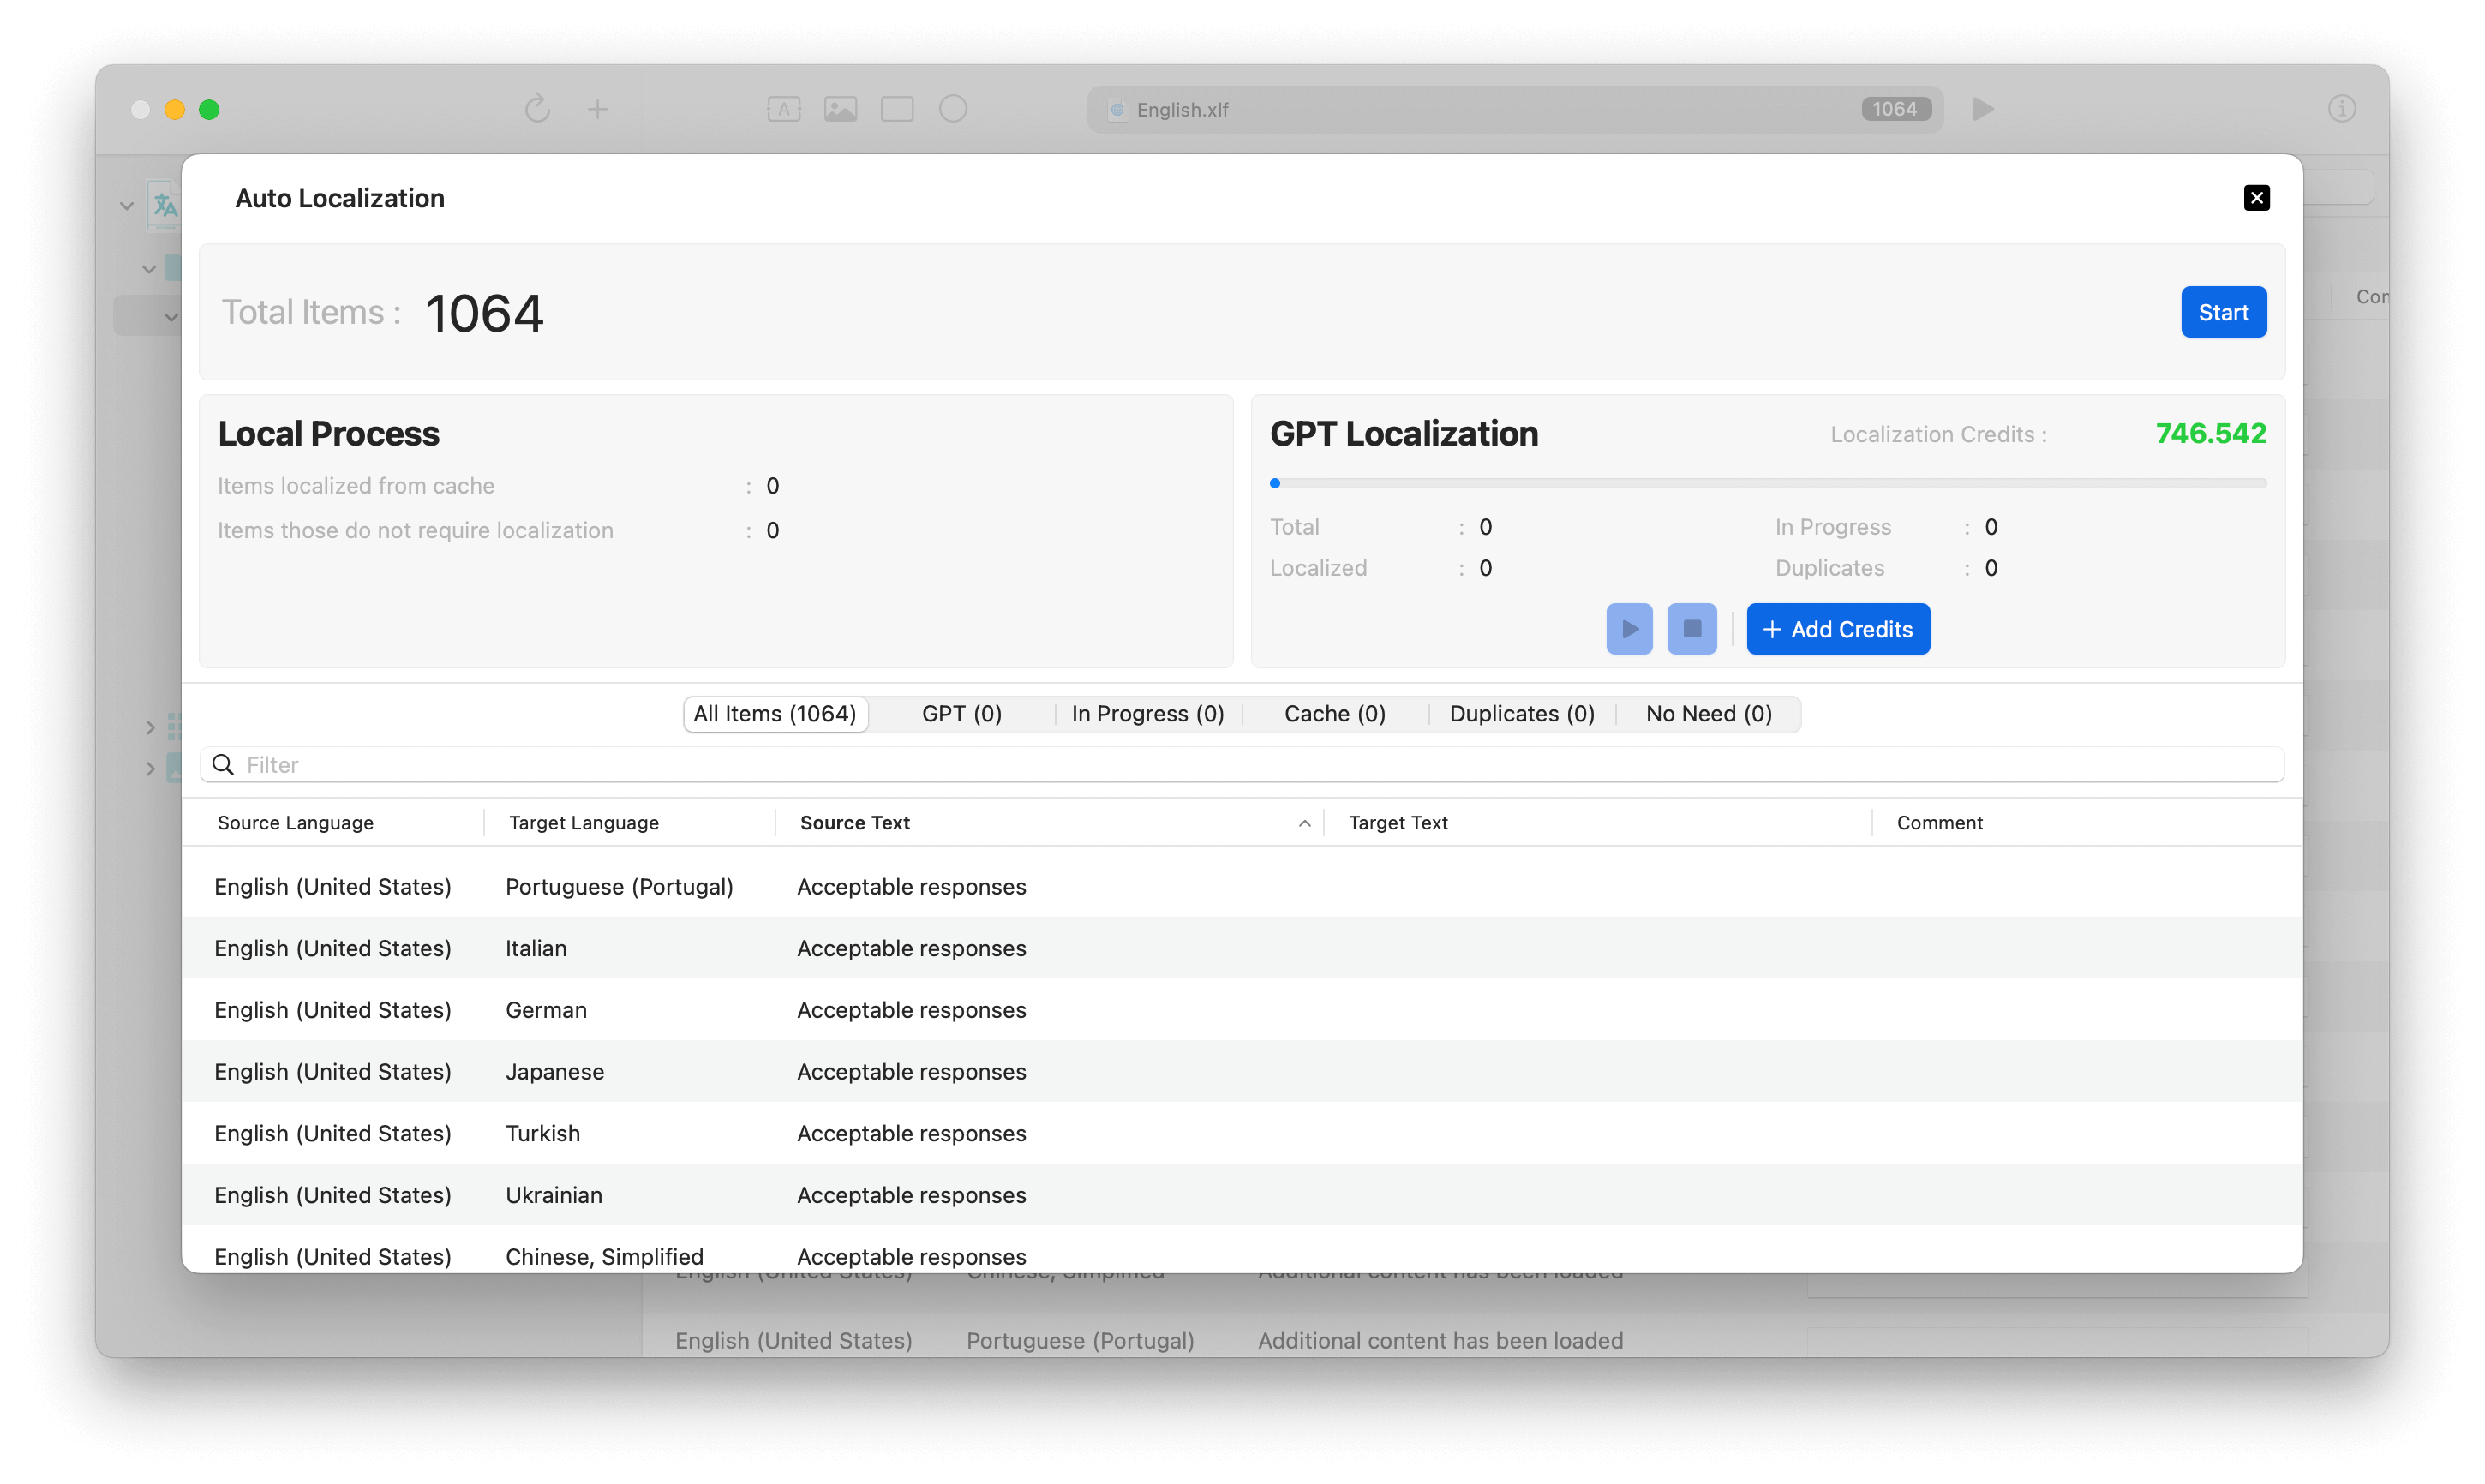
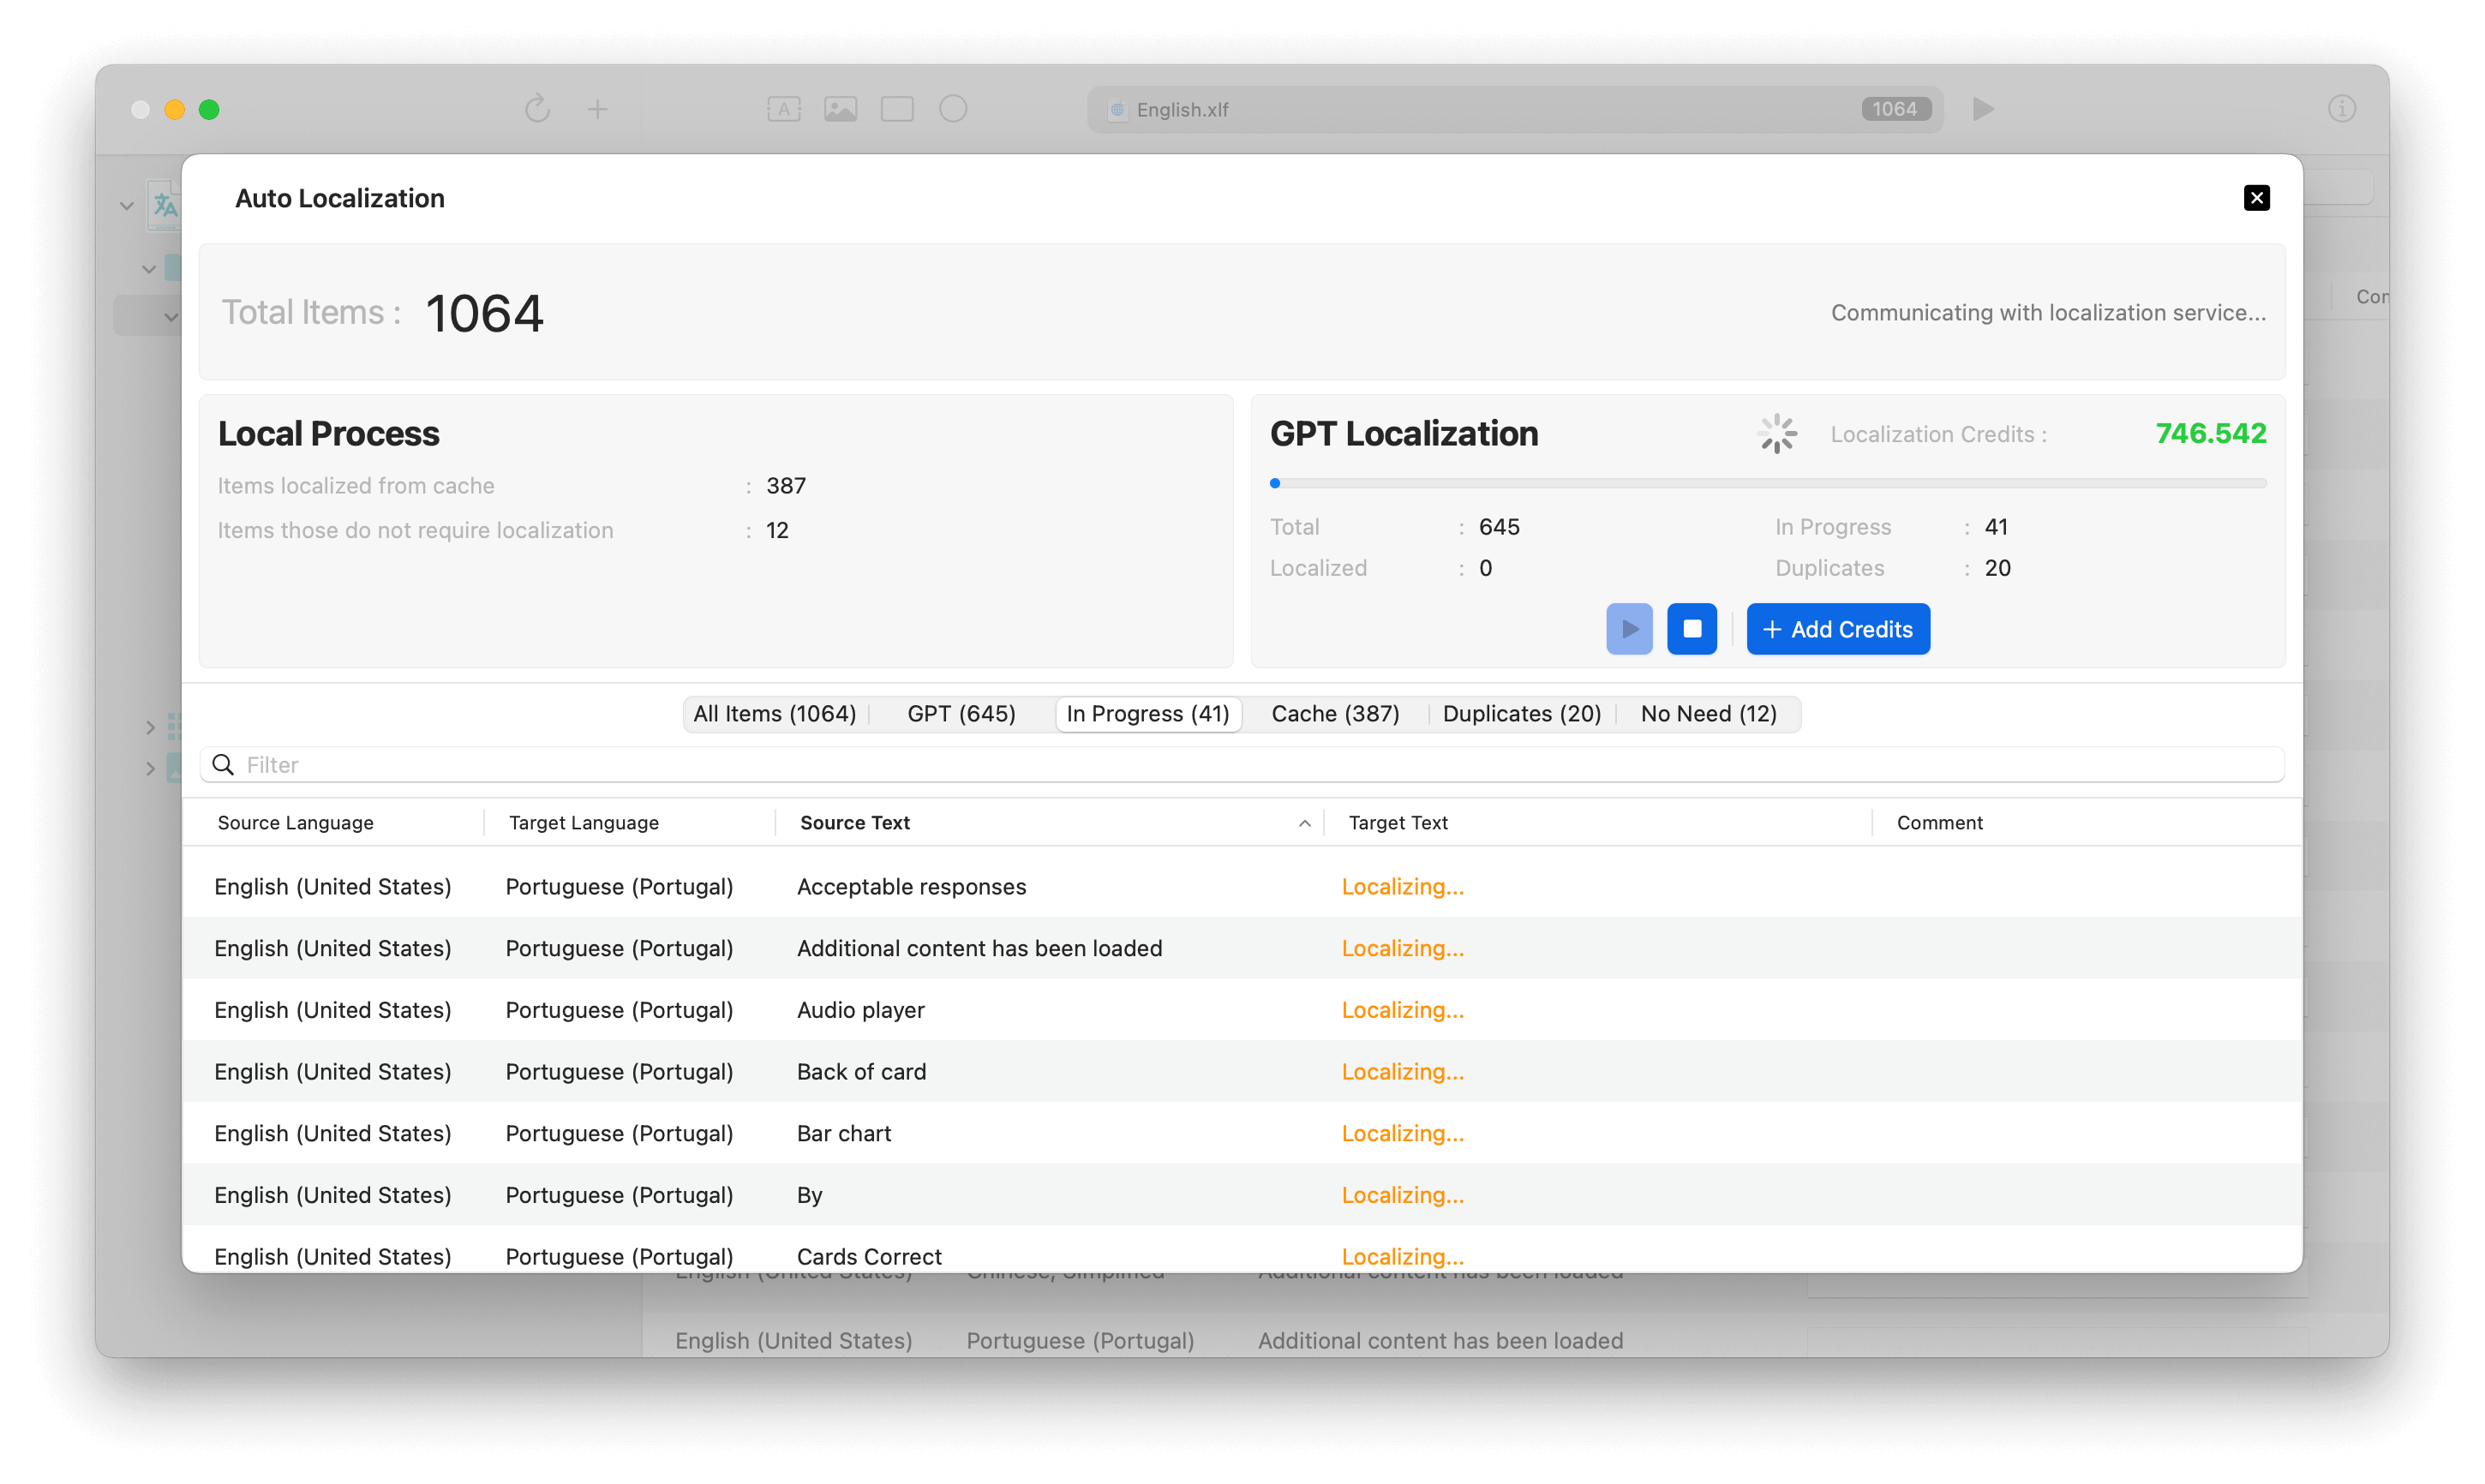
Open the automatic localization screen by clicking on the "Localize" button on the toolbar. All you have to do on this screen is to start the translation process by pressing the "Start" button. The application will translate the XLIFF contents created in the target languages using Open AI's most advanced GPT models.
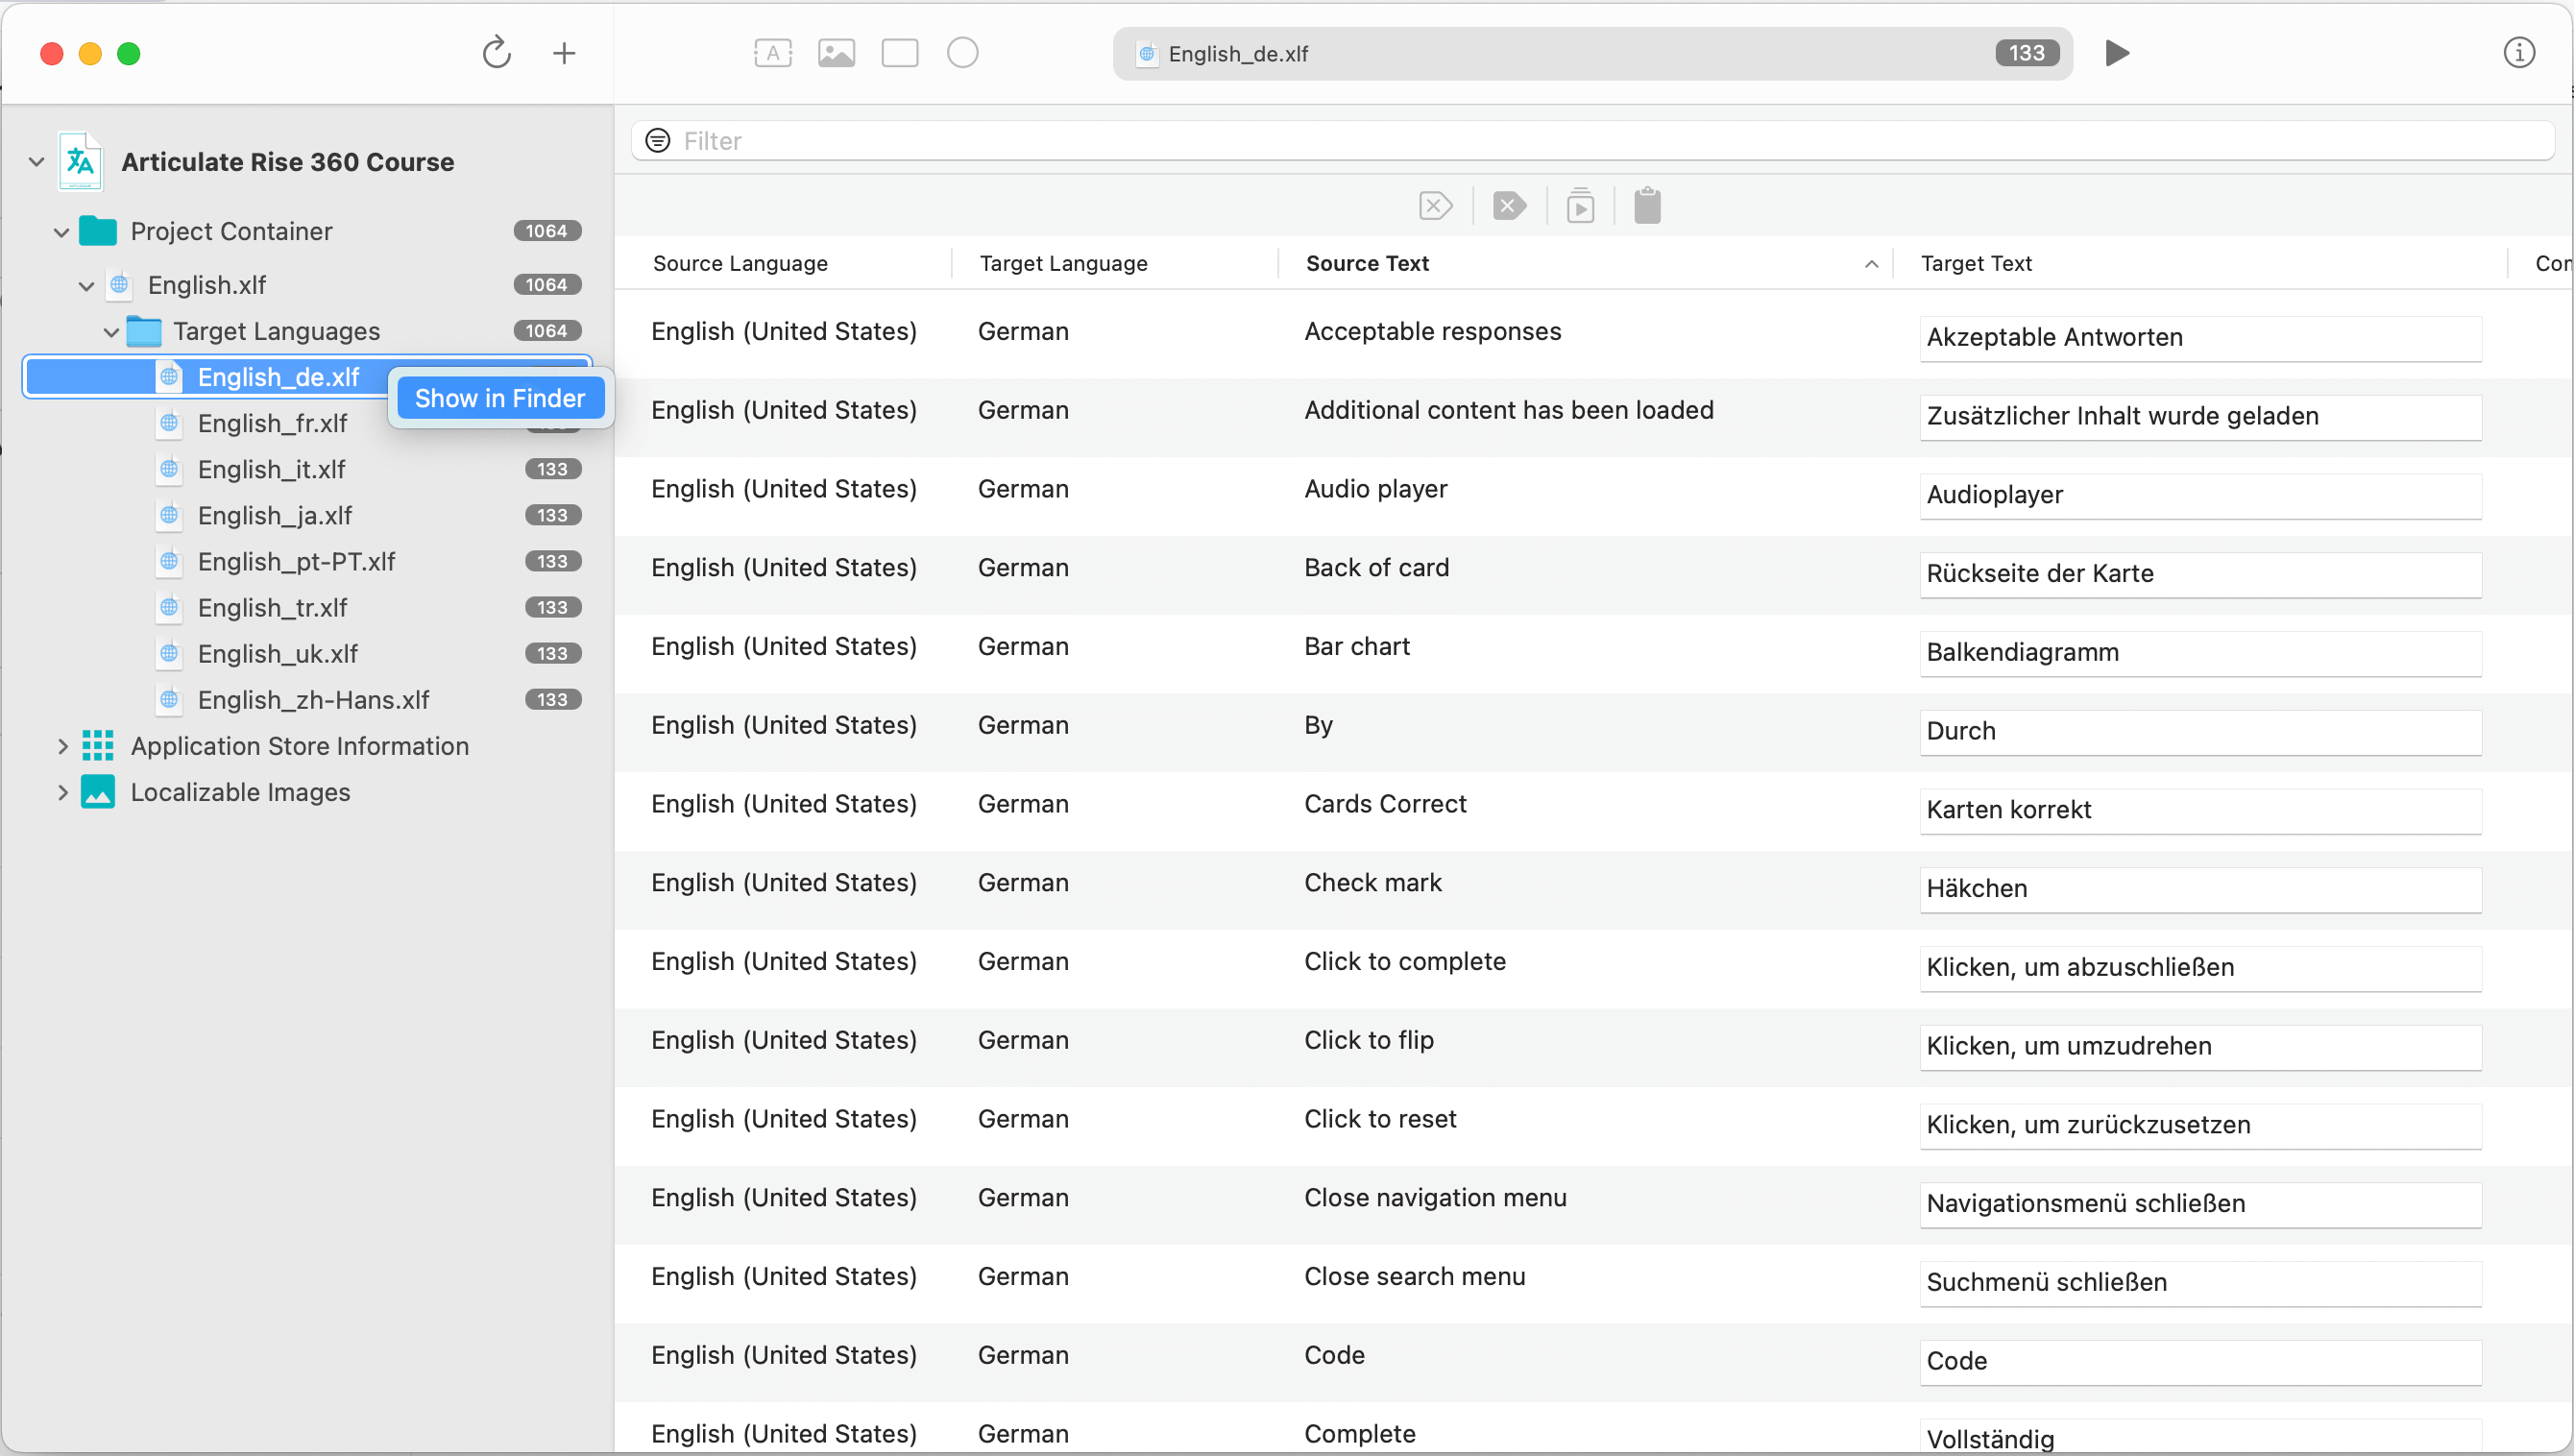
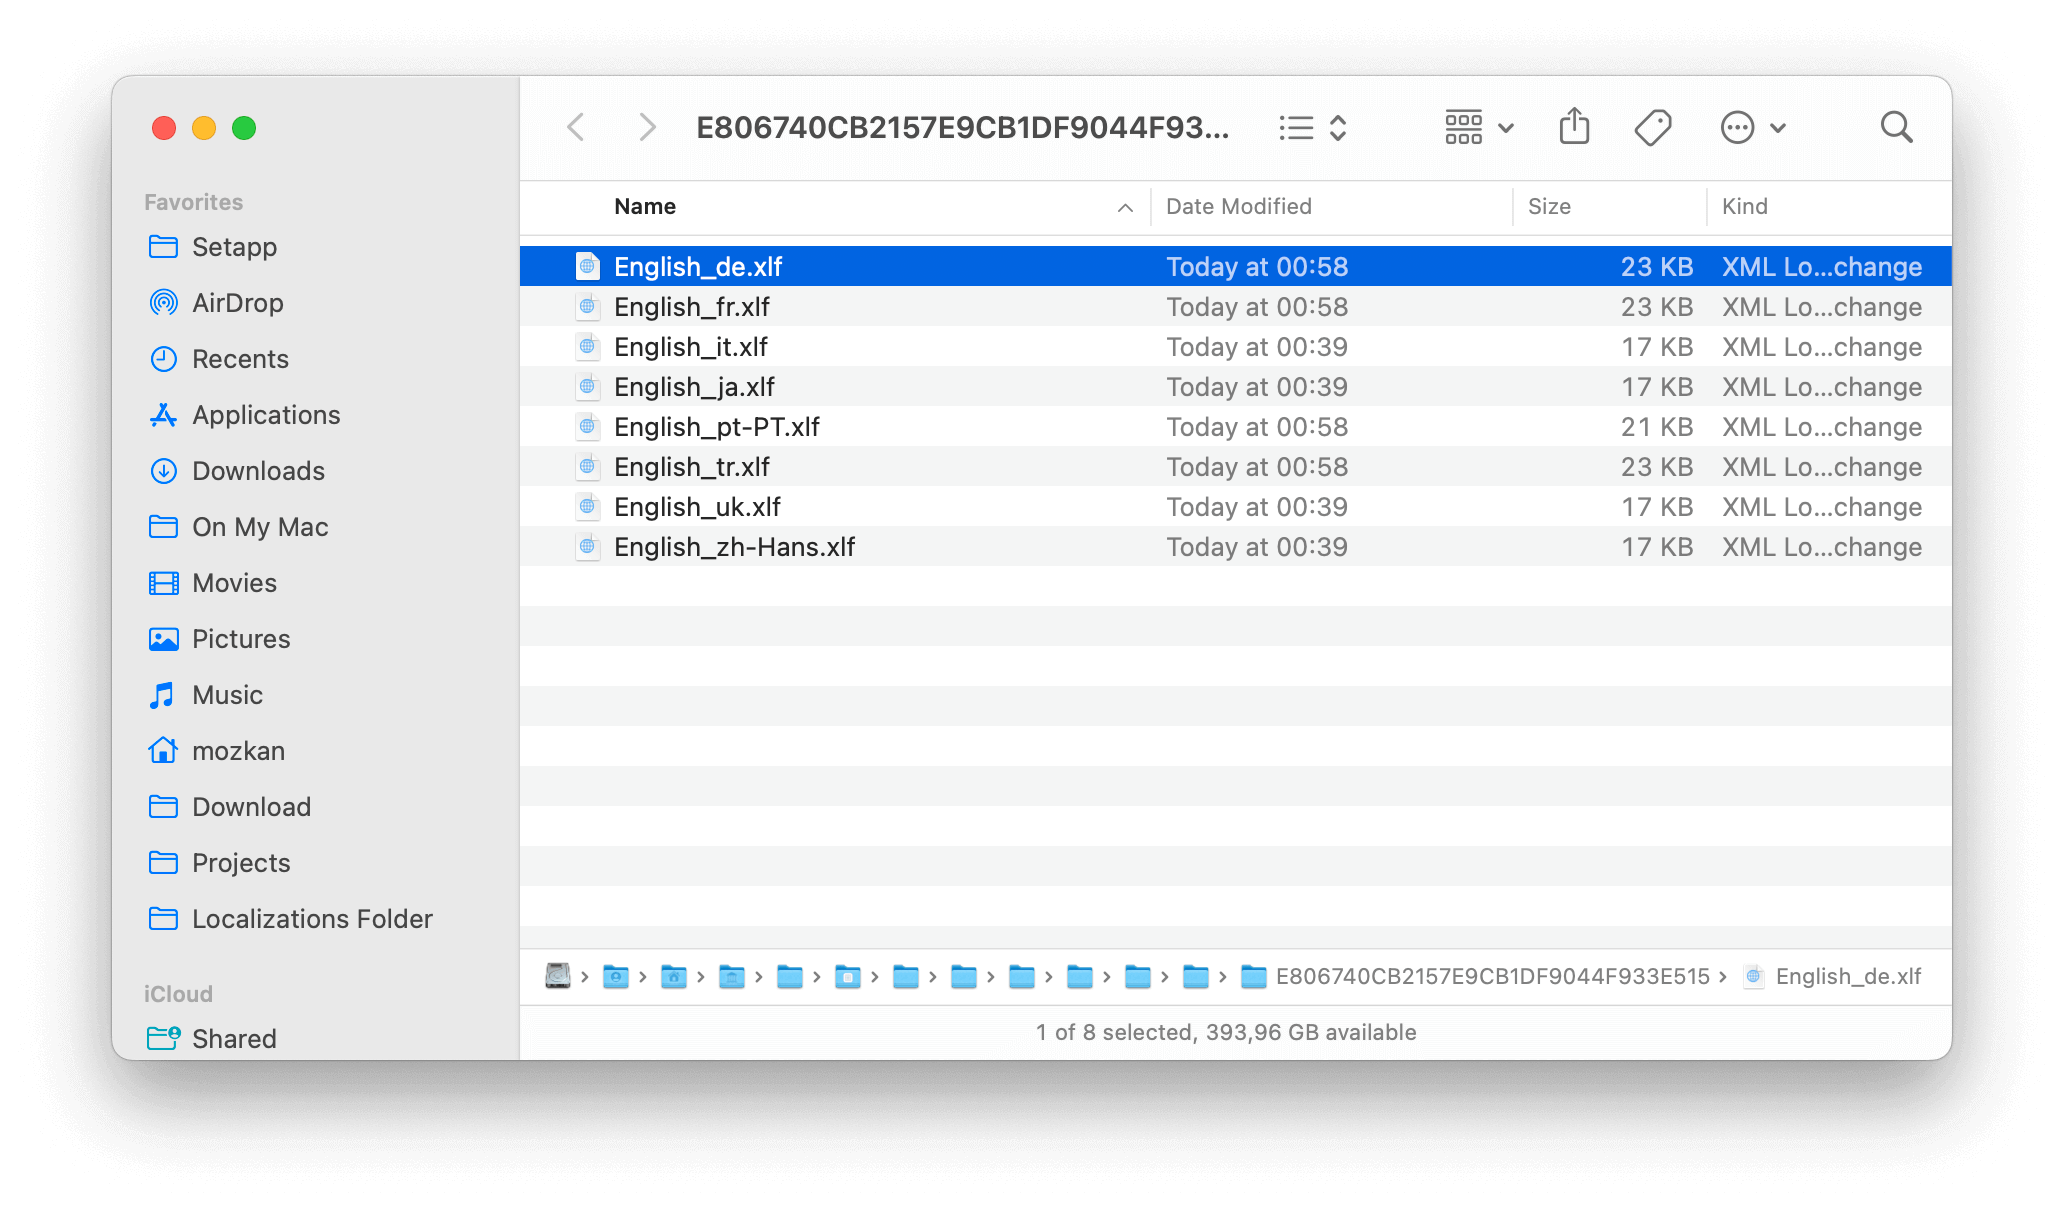
After the translation process, right click on the newly created XLIFF files to access "Show in Finder" option. In the opened folder, you will find the newly created, translated XLIFF files.
Open the settings page of your Articulate Rise course again. Use the "IMPORT TRANSLATED TEXT" button there to import new XLIFF files for each course you duplicated. Congratulations! You've translated your course into many languages within minutes.